

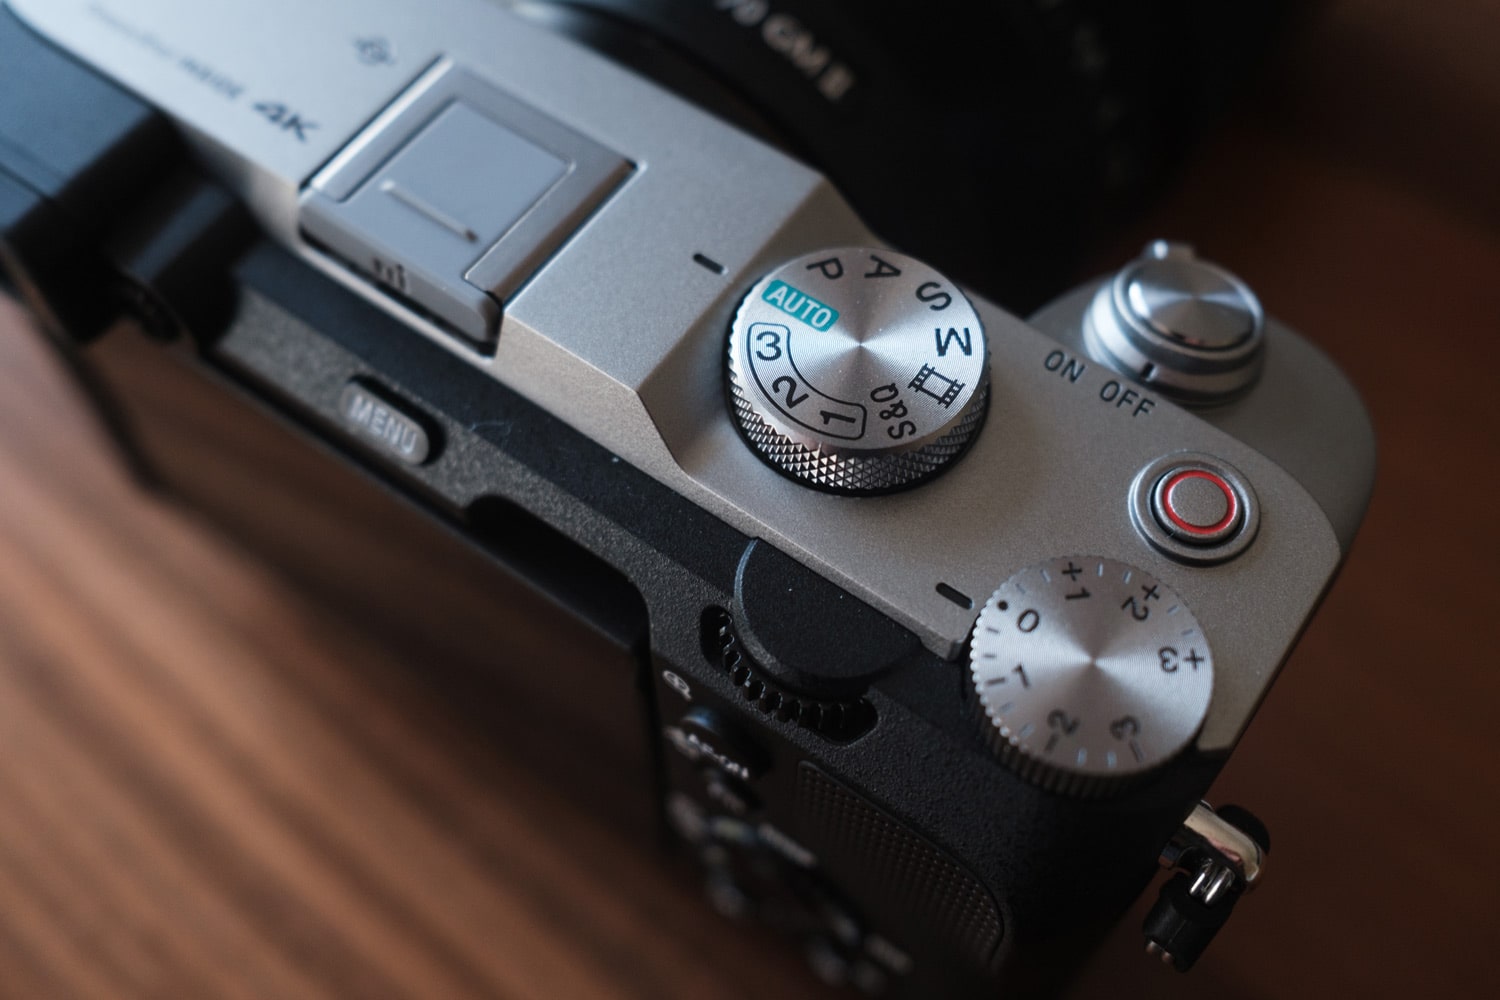
It’s time to make the jump from mindlessly hitting the capture button to mastering the secret language of camera shooting modes. Ready to crack the codes labeled P, A/Av, S/Tv, and M?
These are not just random letters but the keys to controlling exposure: the holy trinity of Shutter Speed, Aperture, and ISO.
By the end of this guide, you’ll be bending light to your will, composing shots with flair, and maybe, just maybe, you’ll stop using that ‘Auto’ mode as a crutch!
So let’s dive in.
Everything About Camera Modes
There are different camera modes, each equipped for different purposes. If you’re the type of photographer whose camera spends more time in a drawer than in your hand, auto camera shooting modes will take care of the technical details, freeing you to focus on the other aspects.
On the one hand, we have Aperture Priority, otherwise known as the ‘A’ setting or the ‘Av’ on Canons. Conversely, we have Shutter Priority, ‘S’ for most, and ‘Tv’ for Canon fans. These modes on a camera allow you a certain level of control, but ultimately, the camera sets the exposure.
Then there’s full Manual Mode, where your camera isn’t pulling the strings on how your exposures turn out.
Let’s see what each of these types of camera modes are all about:
Auto Mode (A)
Using Full Auto Mode is more accessible and less intimidating because it manages the complexities of gear changes and clutch control for you. It handles all the intricate details of adjusting the aperture, shutter speed, ISO, and white balance for you. If your camera has a built-in flash, Auto Mode also decides when it’s needed.
This camera shooting mode can’t always account for challenging lighting conditions. It’s set up for average lighting situations and can be easily misled by particularly bright or dark scenes. Also, Auto Mode does not usually allow you to adjust the exposure compensation, limiting your creative control.
Many experienced photographers view Auto Mode with disdain, comparing it to riding a bike with training wheels. They argue that it prevents you from fully mastering the art of photography because it doesn’t challenge you to understand how various settings affect the final image.
However, like training wheels help a novice biker gain confidence and understand balance, Auto Mode can serve as a stepping stone for novice photographers. It can help them familiarize themselves with their camera and understand how different settings affect a photo.
Free Lightroom Course for Parents. Create Natural, Professional Family Photos
Learn how to make your family photos bright, natural, and frame-worthy, even if you’re brand new to Lightroom.
When I first delved into the world of photography, I made a conscious decision to steer clear of the tempting Auto Mode on my camera. I knew that relying solely on it would stifle my creativity and hinder my growth as a photographer.
Instead, I chose to explore the semi-automatic and fully manual modes, pushing myself to understand the intricacies of aperture, shutter speed, and ISO.
So, I urge you to resist the allure of Auto Mode. Embrace the challenges of manual photography, and watch your images flourish with your newfound knowledge and creativity.
Program Mode (P)

The ‘P’ in your camera signifies the Program Mode. This mode strikes a balance between the manual and automatic settings. It adjusts the shutter speed and aperture automatically but also allows you to manipulate other settings.
So what is the difference between Auto and Program modes? In program mode, the camera automates exposure but allows manual adjustment of other settings, such as the shooting mode, exposure compensation, and flash. Conversely, Full Auto mode completely automates all the camera settings.
This setting can be handy when shooting fast-paced scenes, such as sports or wildlife, where your primary focus is tracking your subject rather than tinkering with camera settings.
However, remember that you still need to monitor the shutter speed chosen by the camera, as too slow a speed can result in blurry images due to movement. Some cameras offer a variation of the P Mode, prioritizing faster shutter speeds to prevent this.
By default, Program Mode selects safe, middle-of-the-road settings for shutter speed and aperture. However, it can need help in tricky lighting situations, such as strong backlighting, which may result in underexposed (too dark) photos. So you need to keep an eye on how your camera is performing under different lighting conditions.
While P Mode can be helpful, especially for beginners, it’s not for everyone. If you’re used to having complete control over your camera settings, you might find the automatic adjustments of Program Mode frustrating.
Program Mode can be seen as akin to the functionality of a basic point-and-shoot camera, where exposure is adjusted automatically for each shot. If you combine this with auto ISO, then your camera is effectively in fully automatic mode.
Personally, I’ve never used this mode on any of my cameras. It doesn’t differ too much from the fully Automatic Mode. Therefore, I highly recommend staying away from Program Mode and opting for one of the semi-automatic or fully manual camera modes instead.
Aperture Priority Mode (A/Av)

Let’s get into camera priority modes.
The Aperture Priority Mode, denoted by ‘A’ or ‘Av’, offers control over the aperture while the camera sets the shutter speed. Personally, I have found it useful for depth-of-field manipulations.
Let’s think of photography as balancing light to create a picture. You’re playing with different variables to get the right light in your photo. In Aperture Priority mode or A/Av mode, you’re choosing to be in charge of one specific variable – the size of the ‘window’ in your lens that lets light in, also known as aperture.
Your camera then handles the ‘length of time’ that the window is open, or the shutter speed, to ensure the picture is not too dark or bright.
As you know by now, the values for the aperture are expressed in f-numbers. The higher the f-number, the smaller the ‘window’; thus, less light comes in, and vice versa.
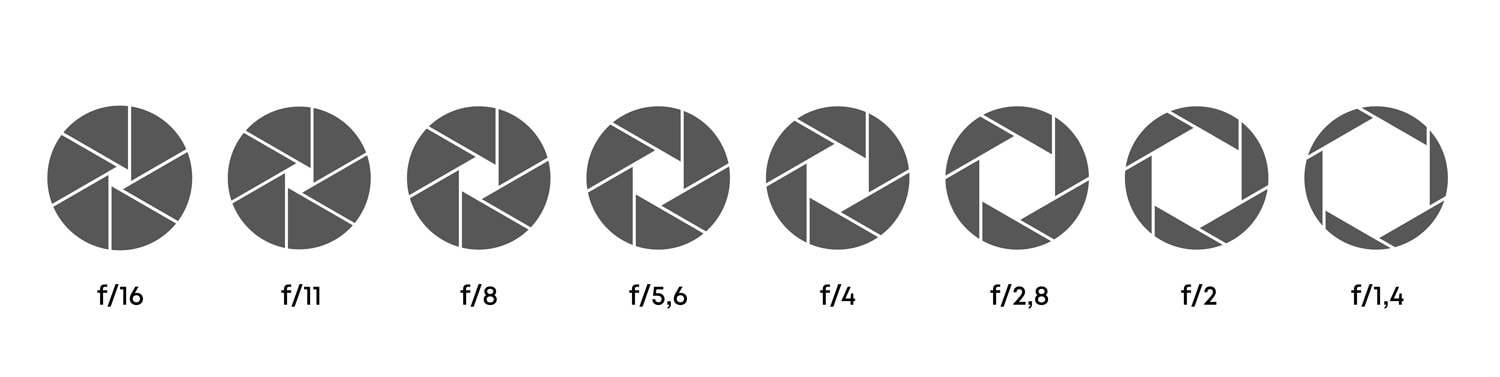
So, when you use a smaller ‘window’ (higher f-number like f/16 or f/22), your camera compensates by keeping the ‘window’ open longer, meaning a slower shutter speed. And, when you use a larger ‘window’ (lower f-number), your camera decides to keep the ‘window’ open for a shorter time or a faster shutter speed.
Another thing the size of your aperture affects is the area of your photo that appears sharp or the depth of field (DOF). A smaller ‘window’ (higher f-number) means more of your image will be clear and sharp, while a larger ‘window’ (lower f-number) means only a specific part of your photo will be sharp, with the rest appearing softer.
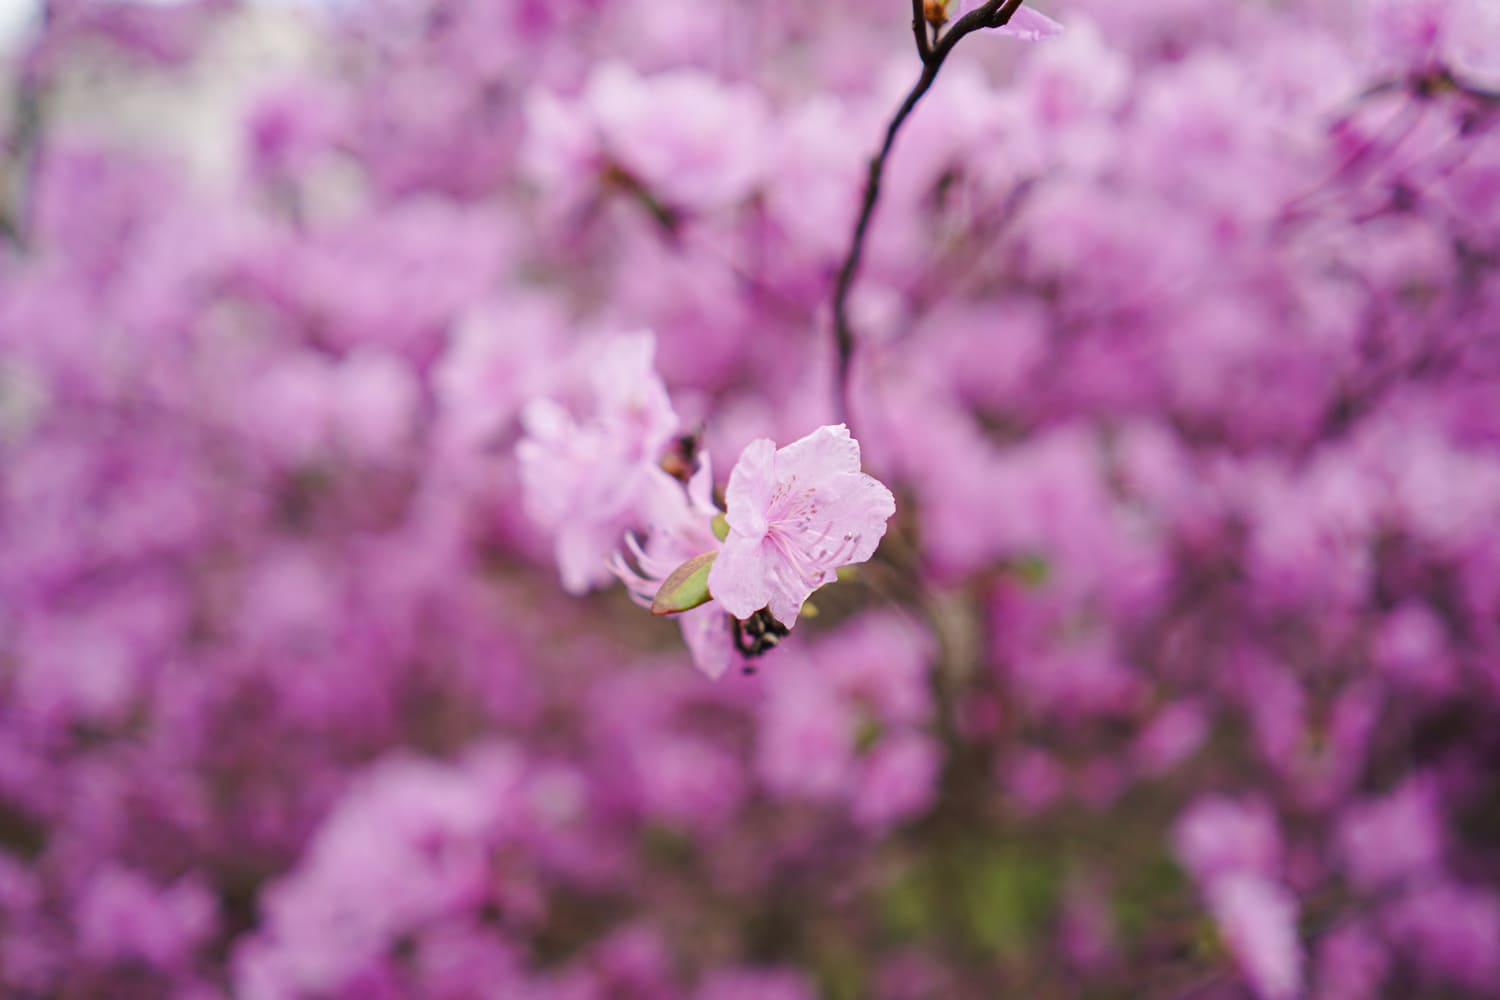
Now, why would you choose to use Aperture Priority mode? Essentially, when deciding the depth of field or how much of your picture is sharp.
Recommended article: Getting to Know Your Camera: All About Aperture in Photography
Shutter Priority Mode (S/Tv)

Next is the Shutter Priority Mode, marked ‘S’ or ‘Tv.’, which allows you to dictate the speed of your camera’s shutter while the camera figures out the best aperture to maintain a balanced exposure. This semi-automatic mode is often found on most DSLRs, mirrorless cameras, and many more. The ISO setting can be either manual or automatic.
This mode comes in handy when the subject’s motion is crucial to the quality of the image. In other words, this is the mode to use if you want to either capture or blur motion.
For instance, when capturing high-speed subjects such as birds in flight, sports actions, or cascading waterfalls, a quick shutter speed (like 1/1000th of a second) will ensure the subject remains sharp without any motion blur.
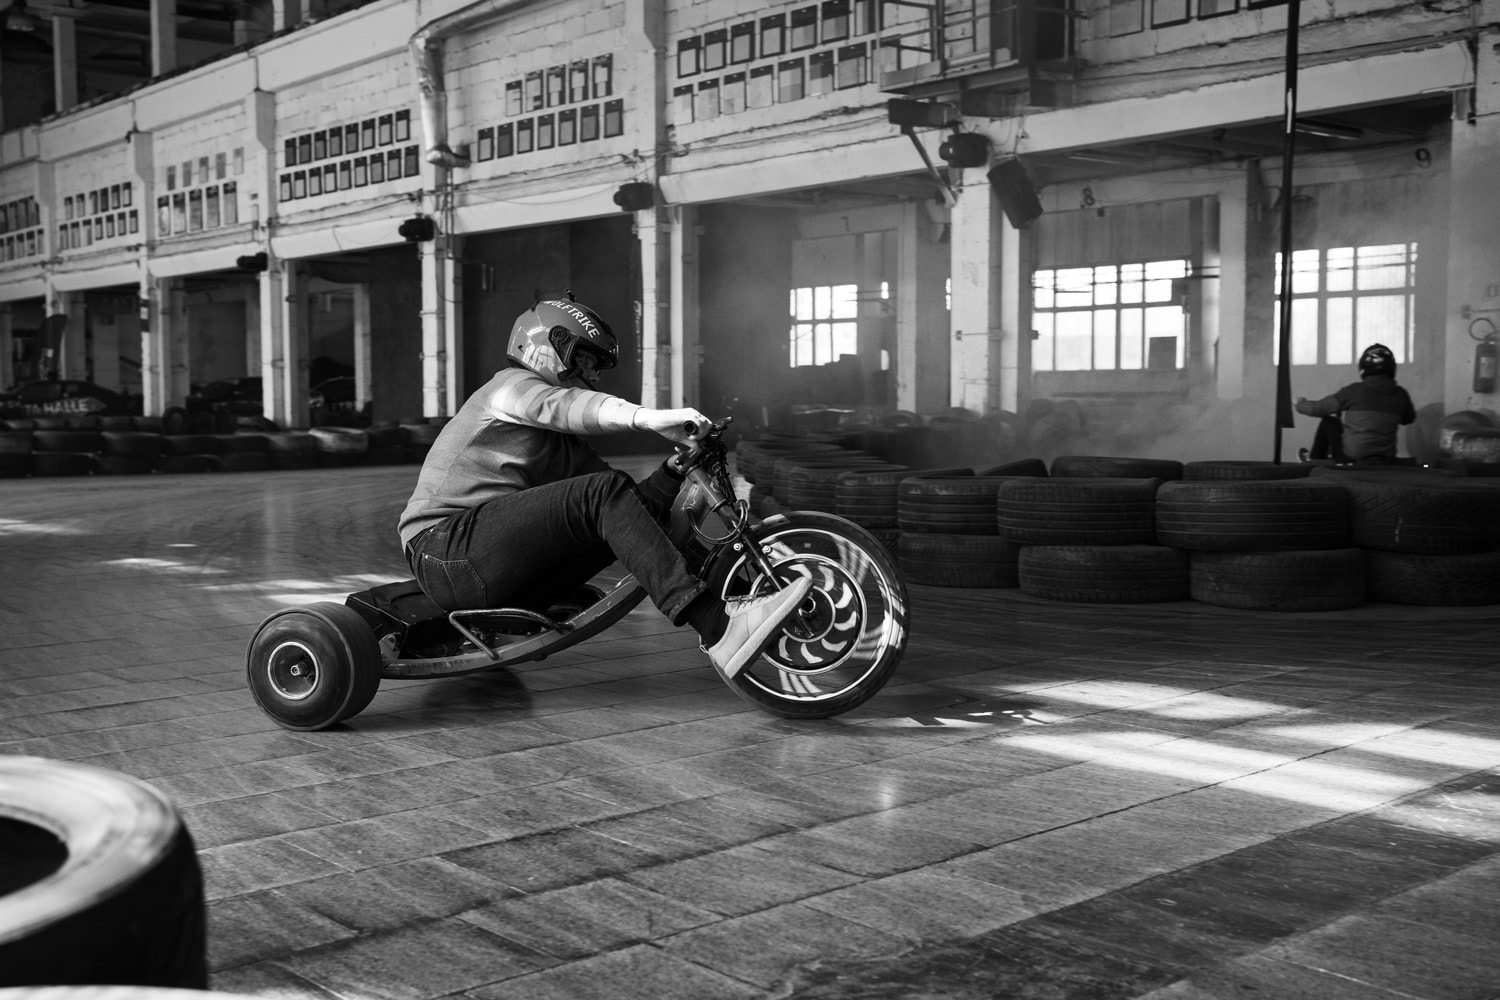
On the other hand, slower shutter speeds can be chosen when you intentionally want to include motion blur in your photos for an artistic effect.
Beyond emphasizing action, this mode is also beneficial in low-light conditions; you can set the shutter speed to a specific limit to prevent camera shake and blurry photos, which can occur if the camera chooses a slow shutter speed.
However, remember that the camera will set the aperture value based on your chosen shutter speed to give a balanced exposure. But the camera’s decision might not always align with your creative vision, in which case Manual Mode might suit you better.
Recommended article: An Introduction to Shutter Speed: A Beginner’s Guide
Manual Mode (M)

Last but not least is the Manual Mode, symbolized by ‘M.’ As the name suggests, it’s all up to you here. You set both the shutter speed and aperture. This mode offers the most creative freedom but requires a solid understanding of your camera.
Consider manual mode (M Mode) in photography akin to driving a stick-shift car. You have to manage all aspects of the vehicle – acceleration, gear changing, clutch – a process that can seem complex for those used to automatic transmissions. However, the reward lies in greater control and precision.
Likewise, in manual mode on a camera, you are the master of all decisions related to exposure – you decide the aperture (which controls the amount of light entering the camera), shutter speed (how long the light is allowed in), and ISO (the sensitivity of your camera’s sensor to light).
Every camera possesses an instrument analogous to a car’s speedometer – an exposure meter or light meter. This meter acts as a guide for configuring the shutter speed, aperture, and ISO.
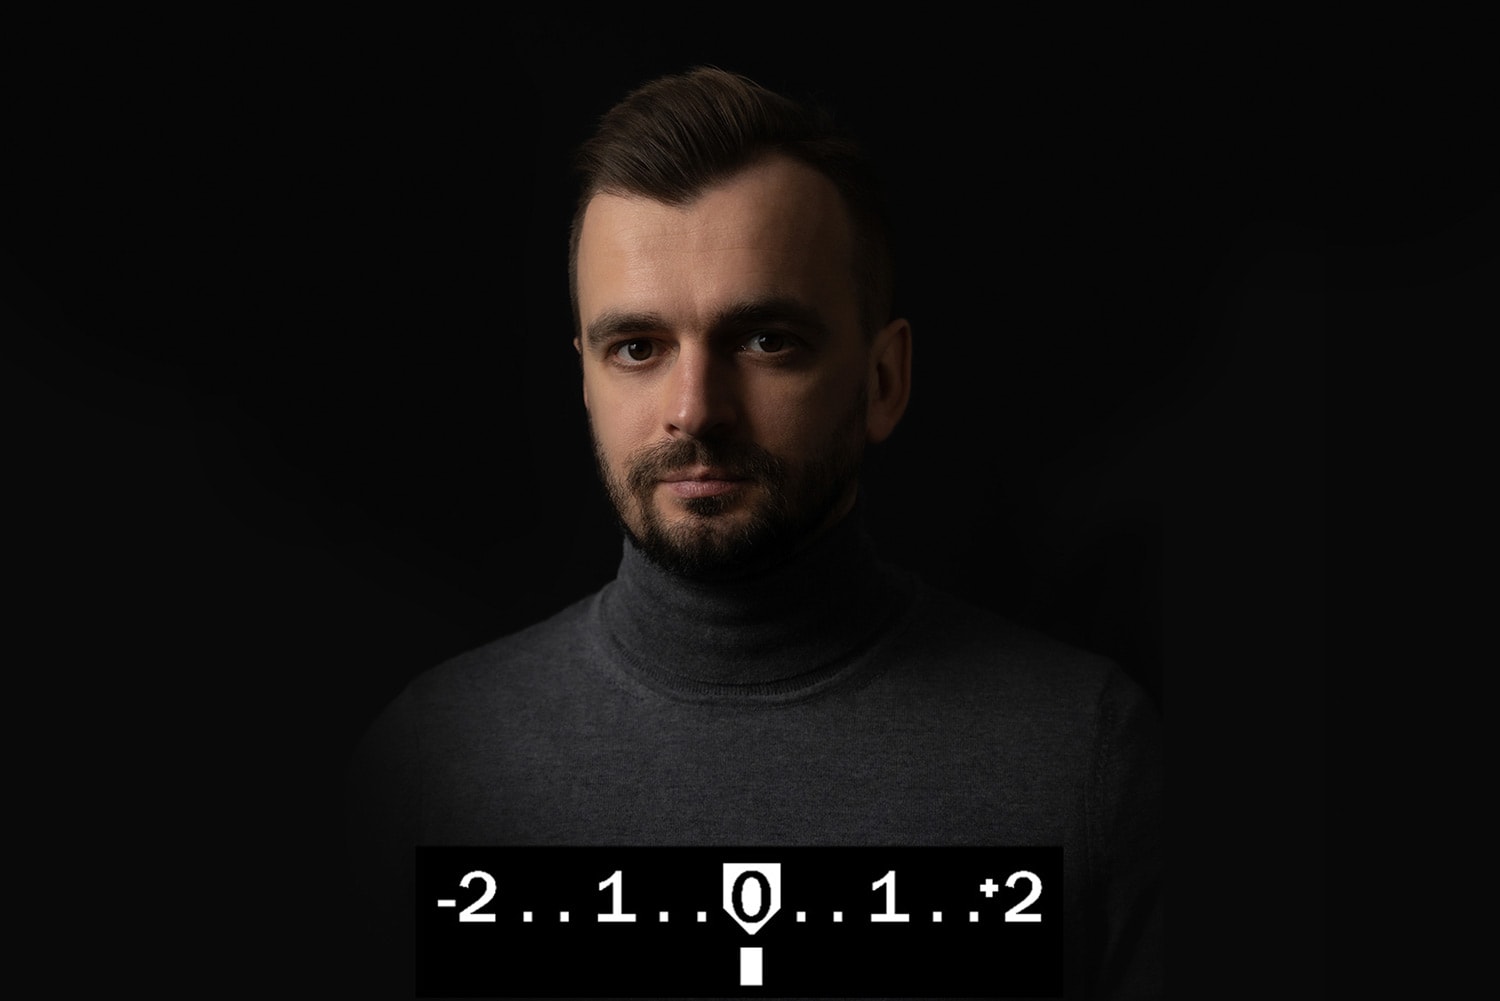
However, this meter is only visible when the camera is in manual mode. Learning to understand the readings of this meter and adjusting the settings accordingly is an art that demands practice. But once mastered, it allows for more creative freedom, as you are compelled to be more observant of the light and all other settings.
Many new photographers fear using manual mode, apprehensive that it may be too intricate and time-consuming, leading to lost opportunities. However, the reality is that photography rarely demands such instantaneous action. And relying solely on your camera’s automated choices may hinder the chance of capturing genuinely unique and captivating shots.
I personally shoot exclusively in Manual Mode, which allows me to achieve precise results and express my photographic vision.
It’s important to note that shooting in Manual Mode doesn’t mean constantly changing camera settings for each shot.
Instead, I typically set my camera settings based on specific lighting conditions and adjust only one variable, usually, the shutter speed, to achieve the desired exposure.
For example, when I’m out in town, I start by deciding on the aperture setting (often f/2.8), then adjust the ISO to 100-200 for bright days. Finally, I use the shutter speed to control the overall exposure of my shot.
Sharpen Your Photography Skills in One Afternoon
Download my free guide with 10 expert techniques that took me years to master. You’ll discover the simple shifts that separate amateur shots from frame-worthy photos.
Join 300+ photographers already leveling up their skills
Other Modes
Some cameras (especially entry-level ones) offer other automatic options called scene modes. Here is a quick overview of these digital camera modes:
Portrait Mode
This mode is explicitly designed to capture people’s portraits. It focuses on the subject, typically a person’s face, and blurs out the background to draw attention to the subject.
For instance, if you photograph a friend at a busy park, you’d use portrait mode. The camera will focus on your friend’s face, making it sharp and well-exposed, while the people and scenery in the background will be blurred, reducing distractions and creating a pleasing aesthetic.

Landscape Mode
Landscape mode is designed to capture wide, scenic images where everything, from the foreground to the background, needs to be in sharp focus.
For example, landscape mode would be the best choice if you’re standing on a mountaintop trying to capture a panoramic view of the valley below, with trees in the foreground, mountains in the middle ground, and the sky in the background.
The camera will use a smaller aperture to increase the depth of field, ensuring that all elements in your composition are sharp.

Macro Mode
This mode is perfect for close-up shots of small objects. Suppose you photograph a tiny insect on a flower or droplets of water on a leaf.
In macro mode, your camera will focus on the close-up details, and depending on the camera, either keep a lot of the image in focus with a small aperture or blur the background with a larger aperture to accentuate the subject.

Sports Mode
Designed for capturing fast-moving subjects. Imagine you’re at a football match and want to catch a player mid-action, with the ball frozen in mid-air.
Sports mode would be ideal, as it uses a fast shutter speed to freeze motion and prevent blur. The camera might also use a larger aperture to allow more light in, compensating for the decreased exposure time.

Night Portrait Mode
This mode is designed to capture people in low light conditions, often using a combination of flash and a slower shutter speed.
Let’s say you’re at an evening party and want to take a picture of a friend. You want not only to illuminate your friend’s face but also capture the ambiance of the scene.
A night portrait mode would balance the use of flash for your friend’s face and a slower shutter speed to expose the background, ensuring a well-balanced image.

Which Camera Mode is the Best?
The question of which camera mode you should use is tough, with sometimes varying opinions. Some people prefer to have SOME creative control but less of a headache and use semi-automatic camera shooting modes – such as camera priority modes. Others want FULL control (I see you, control freaks!)
Despite being sophisticated and built with advanced algorithms, I think the auto mode cannot understand the nuances of every individual shot.
Imagine the auto mode as an eager, algorithmic assistant that follows a script. It is excellent for typical situations with even lighting but can struggle when presented with complex or challenging lighting scenarios.
For instance, you might want to capture the magnificent silhouette of a mountain against a blazing sunset.
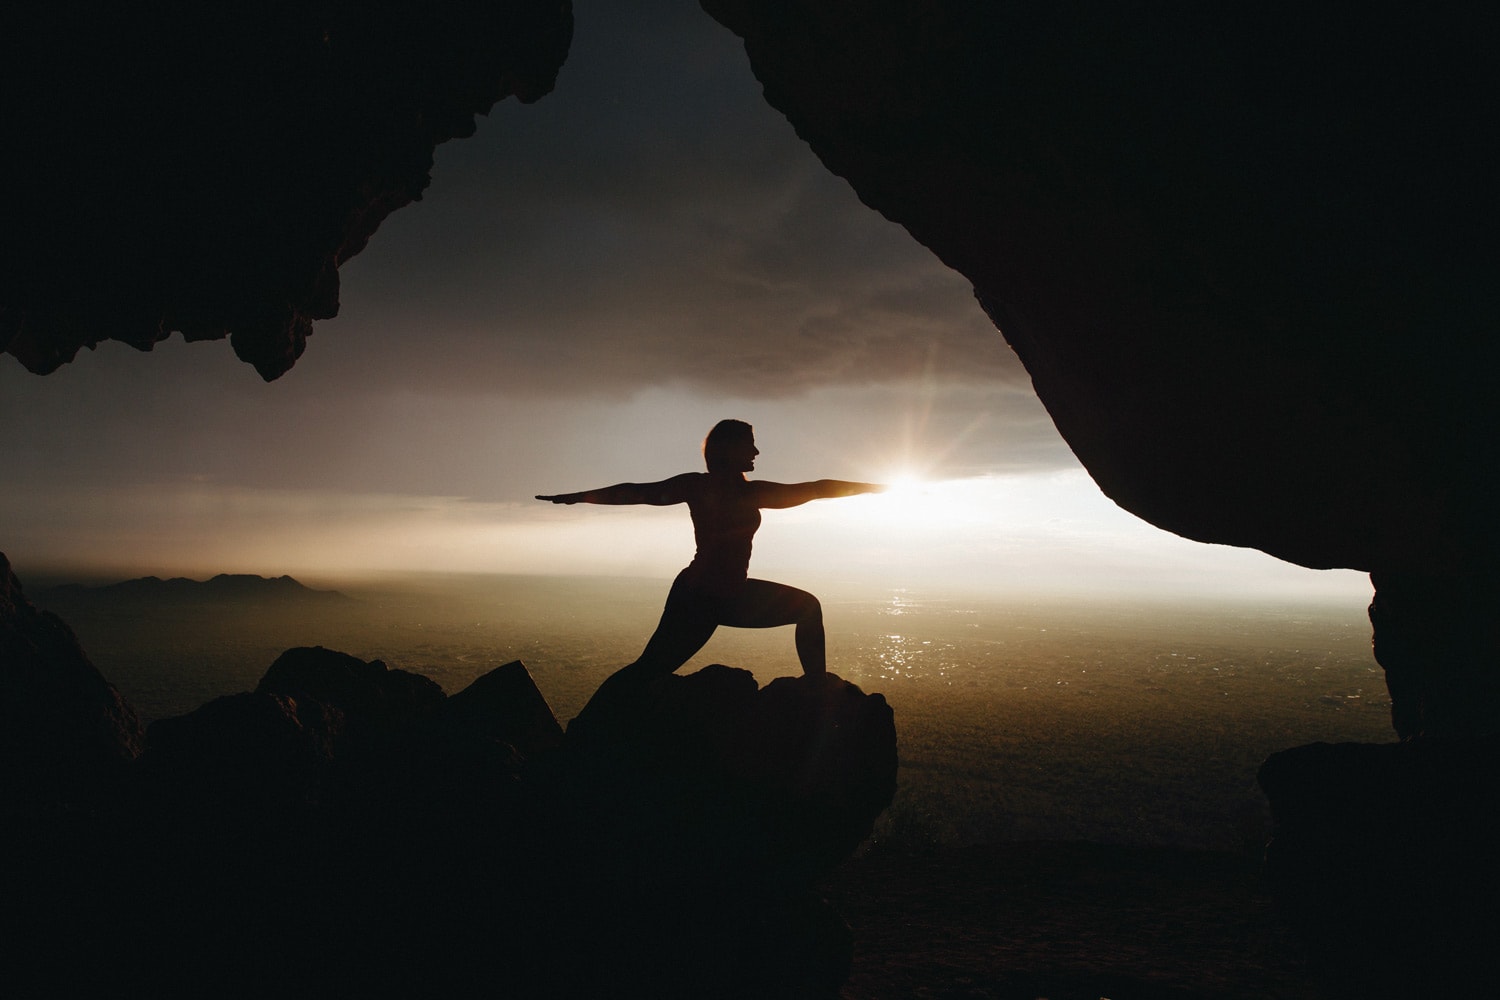
In this scenario, you want the mountain to be underexposed, serving as a stark contrast against the vivid colors of the sky. However, seeing the dark mountain, your camera’s auto mode might try to balance out the exposure, leading to a washed-out sky and a poorly defined silhouette.
This limitation is similar to what you would experience when using Google Translate for a complex piece of prose. While the tool can translate words, it often struggles with context, emotion, and nuance. The same goes for the auto camera modes – they are not equipped to handle intricate artistic intentions or adapt to rapidly changing lighting conditions.
Shooting in manual mode, however, allows you to create exactly the shot you have in mind. It’s like writing your own novel, where you choose every word and set every scene just as you want it to be.
You decide how much light to let in (aperture), how long to let it in (shutter speed), and how sensitive your camera is to the light (ISO).
This enables you to control everything from the depth of field to the motion blur and the exposure.

Exploring Different Camera Modes: Conclusion
Now that we have the camera modes explained, you can really delve into your photography experience. And while all these auto modes on a camera have their utility, the ultimate goal of your photography is complete control so that you can focus on developing creatively.
American photographer Aaron Siskind beautifully said, “Photography is a way of feeling, touching, loving.”
So, let’s explore these modes and start feeling, touching, and loving the world through our lenses!
Photography is as much a science as it is an art. By understanding these camera modes, we can make our science more precise and art more expressive. And isn’t that a delightful symbiosis?
To get more skilled at mastering this symbiosis, visit our other articles here at OhMyCamera – and find the ones that help you the most.