

As an avid photographer, I can’t overemphasize the importance of a perfectly sharp image. When you view a photo, the first thing you naturally gravitate towards is the point of sharp focus.
You might’ve occasionally asked yourself, “Why are my photos not sharp enough?”. Well, there are several reasons. I will arm you with the right information to create crisp images whenever you click your camera’s shutter.
And if you’re still in doubt after that, you can check out our other insights here on OhMyCamera. Let’s get started!
Understanding Focus

In photography, sharp images are clear images where the subject is entirely in focus. Conversely, it will appear blurry or indistinct if out of focus.
When taking a photo, your camera’s lens directs light to the image sensor. This interaction determines whether the objects in your photo are in focus.
Understanding the sweet spot between blurry and crisp sharpness is like finding the pot of gold at the end of the rainbow.
Free Lightroom Course for Parents. Create Natural, Professional Family Photos
Learn how to make your family photos bright, natural, and frame-worthy, even if you’re brand new to Lightroom.
How to Take Sharp Photos
Some ways to achieve proper focus involve adjusting some in-camera settings while others control the environment. Additionally, there is software that can alter the sharpness of an image.
Let’s overview how to get sharp photos by using these techniques:
Keep Camera Steady
This may sound like the most obvious thing in the world, but the first step to taking sharp images is to keep your camera from moving while taking the photo. The good news is that you can do this in various ways:
Use a Tripod
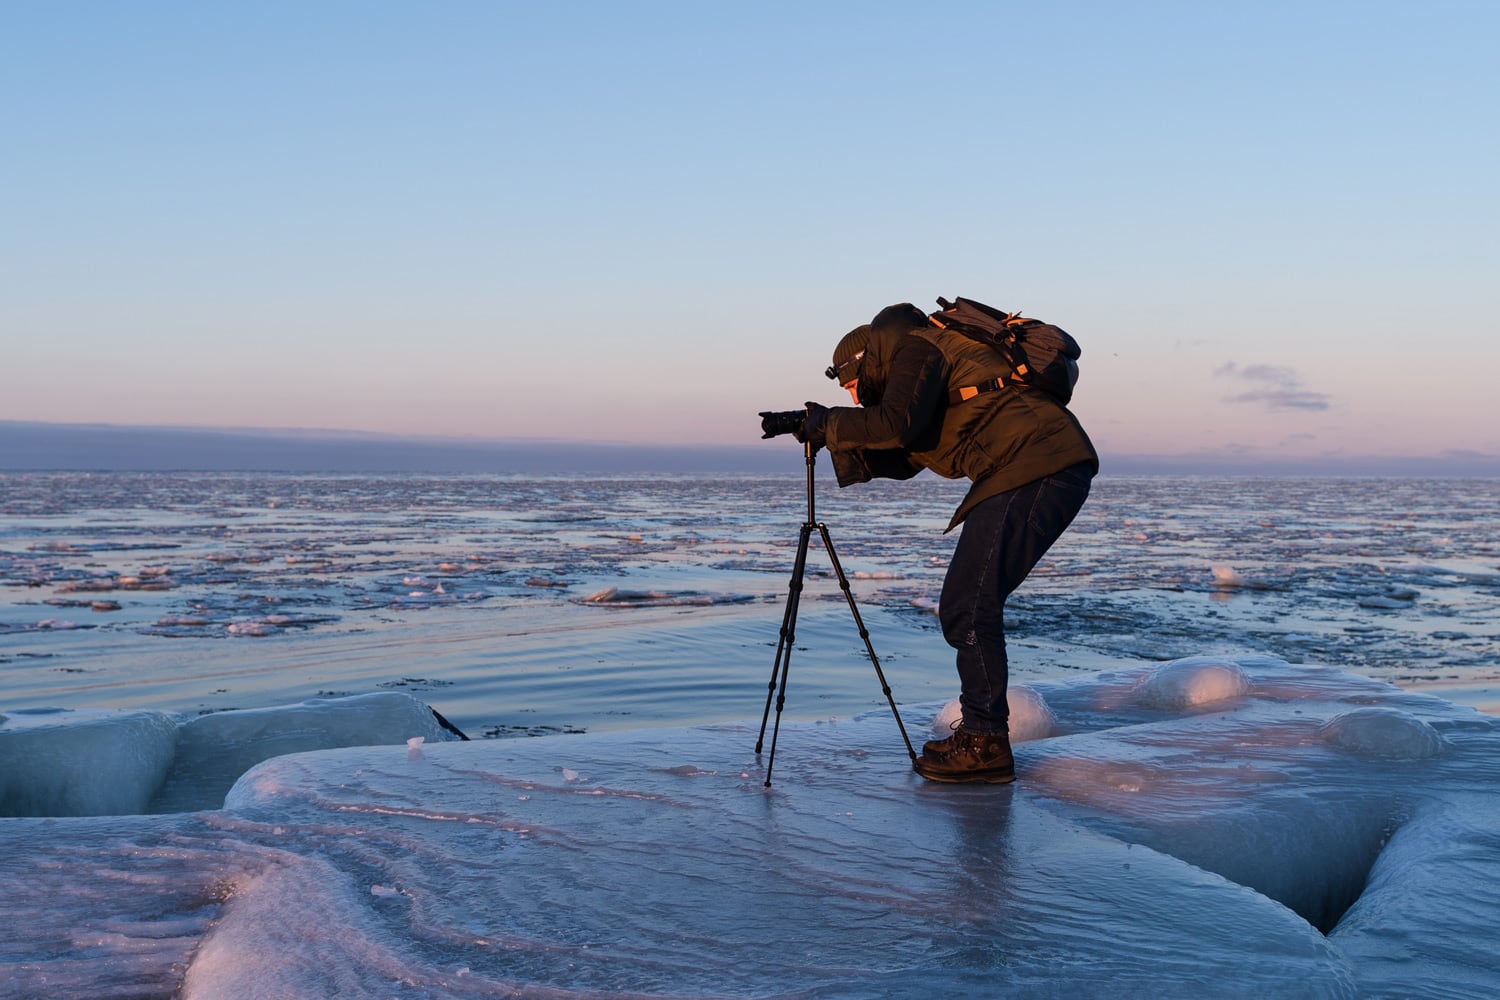
Not only does a tripod keep your camera steady, but it also gives you the flexibility to set up the perfect shot without worrying about holding the camera yourself.
Use a Remote Shutter Release
Pressing the shutter release button on the camera can introduce a tiny movement that might blur the image, particularly in macro photography or long exposures. A remote shutter release allows you to trigger the shutter without touching the camera, reducing the risk of a camera shake.
Hold Your Camera Properly and Adjust the Setting When Handholding

When holding your camera, use both hands: one around the body and one around the lens. Keep your elbows close to your body to provide extra support. Also, ensure your posture and footing are stable. Lean against a solid object or kneel for additional stability if necessary.
Moreover, consider the ‘reciprocal rule’ for the shutter speed when handholding your camera. This rule suggests that your shutter speed should be at least the inverse of your focal length. For instance, if you’re shooting with a 50mm lens, your shutter speed should be 1/50th of a second or faster to minimize the effects of camera shake.
Remember that image stabilization technology, either in-camera or in-lens, can help you break this rule a bit by offering slower shutter speeds without causing blur. However, it’s still a good guideline to keep in mind.
Sharpen Your Photography Skills in One Afternoon
Download my free guide with 10 expert techniques that took me years to master. You’ll discover the simple shifts that separate amateur shots from frame-worthy photos.
Join 300+ photographers already leveling up their skills
Choose the Right Lens

Not all lenses are created equal, and some are sharper than others. Prime lenses (lenses with a fixed focal length) tend to be sharper than zoom lenses because they have fewer moving parts and elements. Moreover, every lens has a sweet spot – an aperture at which it produces the sharpest images.
Turn Image Stabilization On
Activate your device’s image stabilization feature for optimal picture clarity. This critical step enhances the sharpness of your shots, even without a tripod.
Technological advancements in reducing shake or vibration mean you can capture crystal clear images in various situations, including wildlife photography, all at the flick of a switch.
Selecting the Correct AF Point (Focus Area Selection)
It’s not just about how you focus but also about where you focus. Most cameras allow you to select which part of the scene the camera should focus on, commonly known as AF points.
Here are the critical autofocus area selections that ensure excellent focus clarity in your shots:
- Eye AF area selection: This ensures strikingly clear portraits of people and wildlife.
- Single-point area selection: excellent for capturing ultra-clear images of landscapes and other stationary subjects.
- Dynamic-area selection: Ideal for capturing clear photos of fast-paced action and moving subjects.
- Group-area selection: This mode is perfect for achieving clarity when photographing groups.
Tip for beginners: focus on the subject’s eyes. It’s a classic approach, especially for portraits, as it draws the viewer into the image.
Using the Right Focus Mode
Your camera comes equipped with various focus modes designed for different shooting situations:

- For stationary subjects, I swear by ‘Single-Servo AF (Nikon)’ or ‘One-Shot AF (Canon).’
- But if you’re shooting a marathon runner or a hyperactive puppy, ‘Continuous-Servo AF (Nikon)’ or ‘AI Servo AF (Canon)’ is your best bet.
- For situations where the subject could either be stationary or moving, such as a group photo, it’s best to utilize the Hybrid Autofocus mode.
Experiment With Camera Settings
Dust or particles on your camera sensor can cause spots or blurriness in your images. However, cleaning your camera sensor is a delicate task and should be done carefully to avoid damaging your equipment. You’ll need a blower bulb (also known as a rocket blower), sensor swabs, and a sensor-cleaning solution.
Advanced Techniques for Sharp Images Photography
I think that mastering focus is a continuous process. As you grow in your photography journey, here are some advanced techniques that can help you achieve sharper images:
Use Manual Focus

While modern autofocus systems are highly sophisticated, they are imperfect and occasionally fail to focus on the intended subject. Manual focus allows photographers to determine the exact focus point, enabling precision, especially when working with elements like macro shots or capturing intricate details.
In some scenarios, you can use manual focus to pre-focus on a specific point where the action is expected to happen. Manual focus can also be more effective for night photography or any scene where lighting conditions can be a challenge to autofocus systems.
Experiment With Camera Settings
Fast Shutter Speed
The shutter speed refers to the time your camera’s shutter is open to expose light to the sensor. When the shutter speed is fast, the sensor is exposed to light for a very short period. This is particularly useful when capturing moving subjects. A fast shutter speed minimizes the chances of motion blur, capturing the image in a fraction of a second, resulting in a crisp, sharp image.
Narrow Aperture

The aperture is the adjustable opening in your camera lens that allows light to pass through to the sensor. The size of the aperture is measured in ‘f’ numbers, with smaller numbers (like f/1.4) representing a wider aperture and larger numbers (like f/16) defining a narrower aperture.
A narrow aperture (a higher f-number) provides a more significant depth of field, meaning that more of your image will be in sharp focus from foreground to background.
However, remember that using a narrow aperture means less light can reach the sensor, so you’ll need to balance this with your other camera settings.
Another thing to consider is the ideal range for a sharper image, also known as the “sweet spot”, which is usually around f/8. If you go too narrow, you may notice a loss in sharpness due to diffraction.
Remember that every lens is different, so conduct a series of tests to identify the sharpest setting for your specific lens by taking a sequence of photos at varied apertures and then examining the sharpness of each image on your computer.
Free Lightroom Course for Parents. Create Natural, Professional Family Photos
Learn how to make your family photos bright, natural, and frame-worthy, even if you’re brand new to Lightroom.
Keep ISO Low

ISO is the sensitivity of your camera’s sensor to light. Lower ISO values (100 or 200) mean the sensor is less sensitive to light, while higher values (1600 or 3200) suggest it is more sensitive. Lower ISO values will result in clearer, sharper images with less noise. Increasing ISO can introduce noise (graininess) to your photos, reducing sharpness.
However, the trade-off is that a lower ISO requires more light for proper exposure. So, if you’re shooting in a low-light situation, you might need to increase the ISO to get a properly exposed image.
Use Focus Stacking
In my experience, focus stacking is one of the best techniques for achieving sharp photos, especially in product and landscape photography.
It involves taking multiple shots at different focus distances and combining them in post-processing to create an image with maximum sharpness.
Shoot in Burst Mode
Burst mode, also known as continuous shooting mode, is available in most digital cameras today, including DSLRs and mirrorless ones. When you hold down the shutter button, the camera takes a series of photos in quick succession.
The more photos you take, the higher your chances are of getting an adequately focused shot, making it useful in scenarios where the moment is fleeting, and you may not get a second chance for a picture.
PRO TIP: For fast-moving subjects, consider using continuous or tracking autofocus settings. These modes allow your camera to adjust focus as your subject moves.
Understanding Depth of Field
Another way to master focus entirely is by learning about Depth of Field (DoF).

Depth of field refers to how much of your image is in sharp focus. It’s affected by your lens’ focal length, the aperture, and the distance between the camera and the subject. By understanding DoF, you gain creative control over your images. You decide what is in focus and what is not.
Situations Where a Sharper Image Is Not Desirable – Creative Possibilities
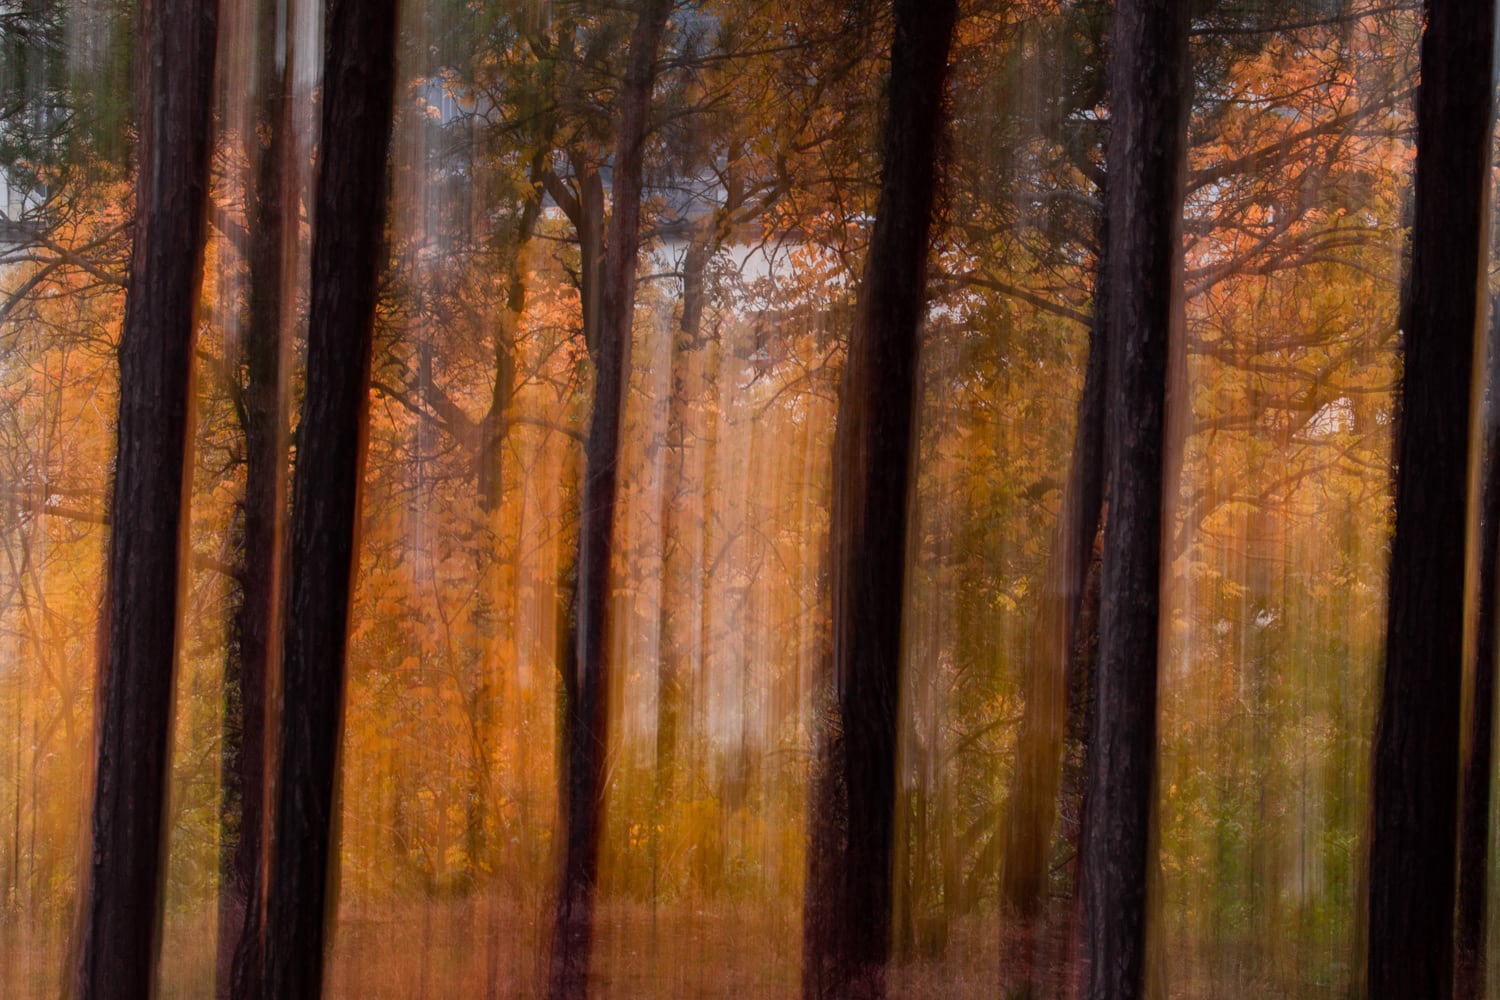
Impressionist Photography

Just like Impressionist painting, this style of photography emphasizes the experience or feeling of an image over the detail. Less sharp photos, blurry lights, and colors can create a dream-like or fantastical atmosphere you can’t get with a sharp image.
Retro Style

If you’re trying to create a nostalgic or retro feeling, using less sharp photos can help to achieve this. Old photographs often have a distinct lack of sharpness that we associate with the past, and emulating this can make your photos feel more authentic.
Abstract Photography
For abstract images, sharpness is often less important than color, shape, and texture. In some cases, less sharp images can actually enhance these aspects, creating a more compelling abstract image.
Surreal Photography

When creating surreal or dream-like images, a sharper image can sometimes make the scene feel too realistic and detract from the surreal effect. A softer image can enhance the otherworldly feeling and make the photograph more interesting.
Motion Blur

Capturing motion in photography often involves some degree of blur. This is used to signify speed or the passing of time. A sharp photo can negate this effect.
Cinematic Effect

A slightly blurred or ‘soft focus’ image can create a more cinematic or dreamy atmosphere in film and video. This can be particularly effective in romantic or dramatic scenes.
Low Light Photography

In low light situations, a less sharp photo with grain can convey the ambiance better than a tack-sharp image. The noise or grain can add to the mood, giving it a raw or gritty feel.
FAQs
What Is the Sharpest Part of an Image Called?
The sharpest part of an image is referred to as the “point of focus” or “focus point”. This is where the lens is specifically focused, rendering it with the highest clarity and detail.
Depth of field, which refers to the sharp range within an image, can also play a key role in determining how much of the image is in focus.
Does Sharp Mean Good?
In the context of images and photography, “sharp” generally refers to the level of clarity and detail in a photo. A sharp image has clear, distinct, and crisply defined details. This is often desirable because it allows the viewer to see and appreciate finer details.
However, sharpness isn’t always synonymous with a “good” image. The aesthetics of photography involves many elements such as composition, lighting, color balance, and the image’s emotional impact, among other things. Sometimes, a softer or blurred image might convey a certain mood or message more effectively.
Recommended article: The Rule of Thirds: How to Compose Better Photos
What Is a Smooth vs. Sharp Image?
Smooth and sharp images represent two ends of the spectrum regarding image clarity and detail. A sharp image has a high resolution, crisp, clear, and well-defined details. This is often the result of accurate focusing and a small aperture setting in the camera.
A smooth image, on the other hand, can be interpreted in two ways. It might refer to a photo with a shallow depth of field, where the main subject is in sharp focus while the background (and sometimes the foreground) is gently blurred out, creating a “smooth” focus transition.
Alternatively, it can also refer to images intentionally blurred or softened for aesthetic reasons, often to convey a specific mood or atmosphere or to reduce the impact of distracting elements in the frame.
How to Take Sharp Photos: Conclusion
“Focus” is a word synonymous with photography for many. The secret ingredient that magically transforms raw pixels into a story worth a thousand words.
How to take a sharp photo boils down to understanding and mastering focus. While it may take some time and practice, the result is well worth it.
But you may also discover that’s not always the case – sometimes sharpness doesn’t matter all that much. Either way, you’ll find your unique style and create compelling images as you experiment with different focus techniques.
Related articles:
- An Introduction to Shutter Speed: A Beginner’s Guide
- Getting to Know Your Camera: All About Aperture in Photography
- The Essential Guide to Understanding ISO in Photography
- Shooting in Manual Mode: How to Take Control of Your Camera
- A Simple Portrait Photography Exercise (Boost Your Skills Fast)
- Master Your Camera: A Deep Dive into Camera Shooting Modes