


Indoor family photography doesn’t require expensive studio lights or professional photo equipment.
With a few simple tricks using window light and basic camera settings, your ordinary rooms can become mini studios for beautiful natural light family photos.
This guide shows you exactly how to photograph kids indoors using what you already have at home.
Most parents struggle with photography at home without flash because indoor lighting is tricky. Overhead lights create harsh shadows, different bulbs make weird color casts, and by the time you get your camera ready, your kids have moved to the darkest corner.
But indoor spaces have one amazing advantage: windows. Natural light from windows is soft, flattering, and completely free. Once you learn to see and use this light, everything changes.
Walk around your house and look at each window. Which rooms get the most light? Which windows are biggest? This simple exercise will transform how you see your home.
Morning light comes from the east and tends to be cooler and softer. Afternoon light from the west can be warmer and more golden. North-facing windows give consistent, even light all day. South-facing windows get the brightest, most direct sunlight.
Pay attention to how light moves through your home during different times of day. Take some test shots. You’ll quickly discover your home’s sweet spots for indoor family photography tips.
Learn how to make your family photos bright, natural, and frame-worthy, even if you’re brand new to Lightroom.
Once you’ve found your best window, set up a simple shooting area. Move any clutter out of the frame. Push furniture back to create a clean background. You want the focus on your family, not the pile of laundry on the couch.
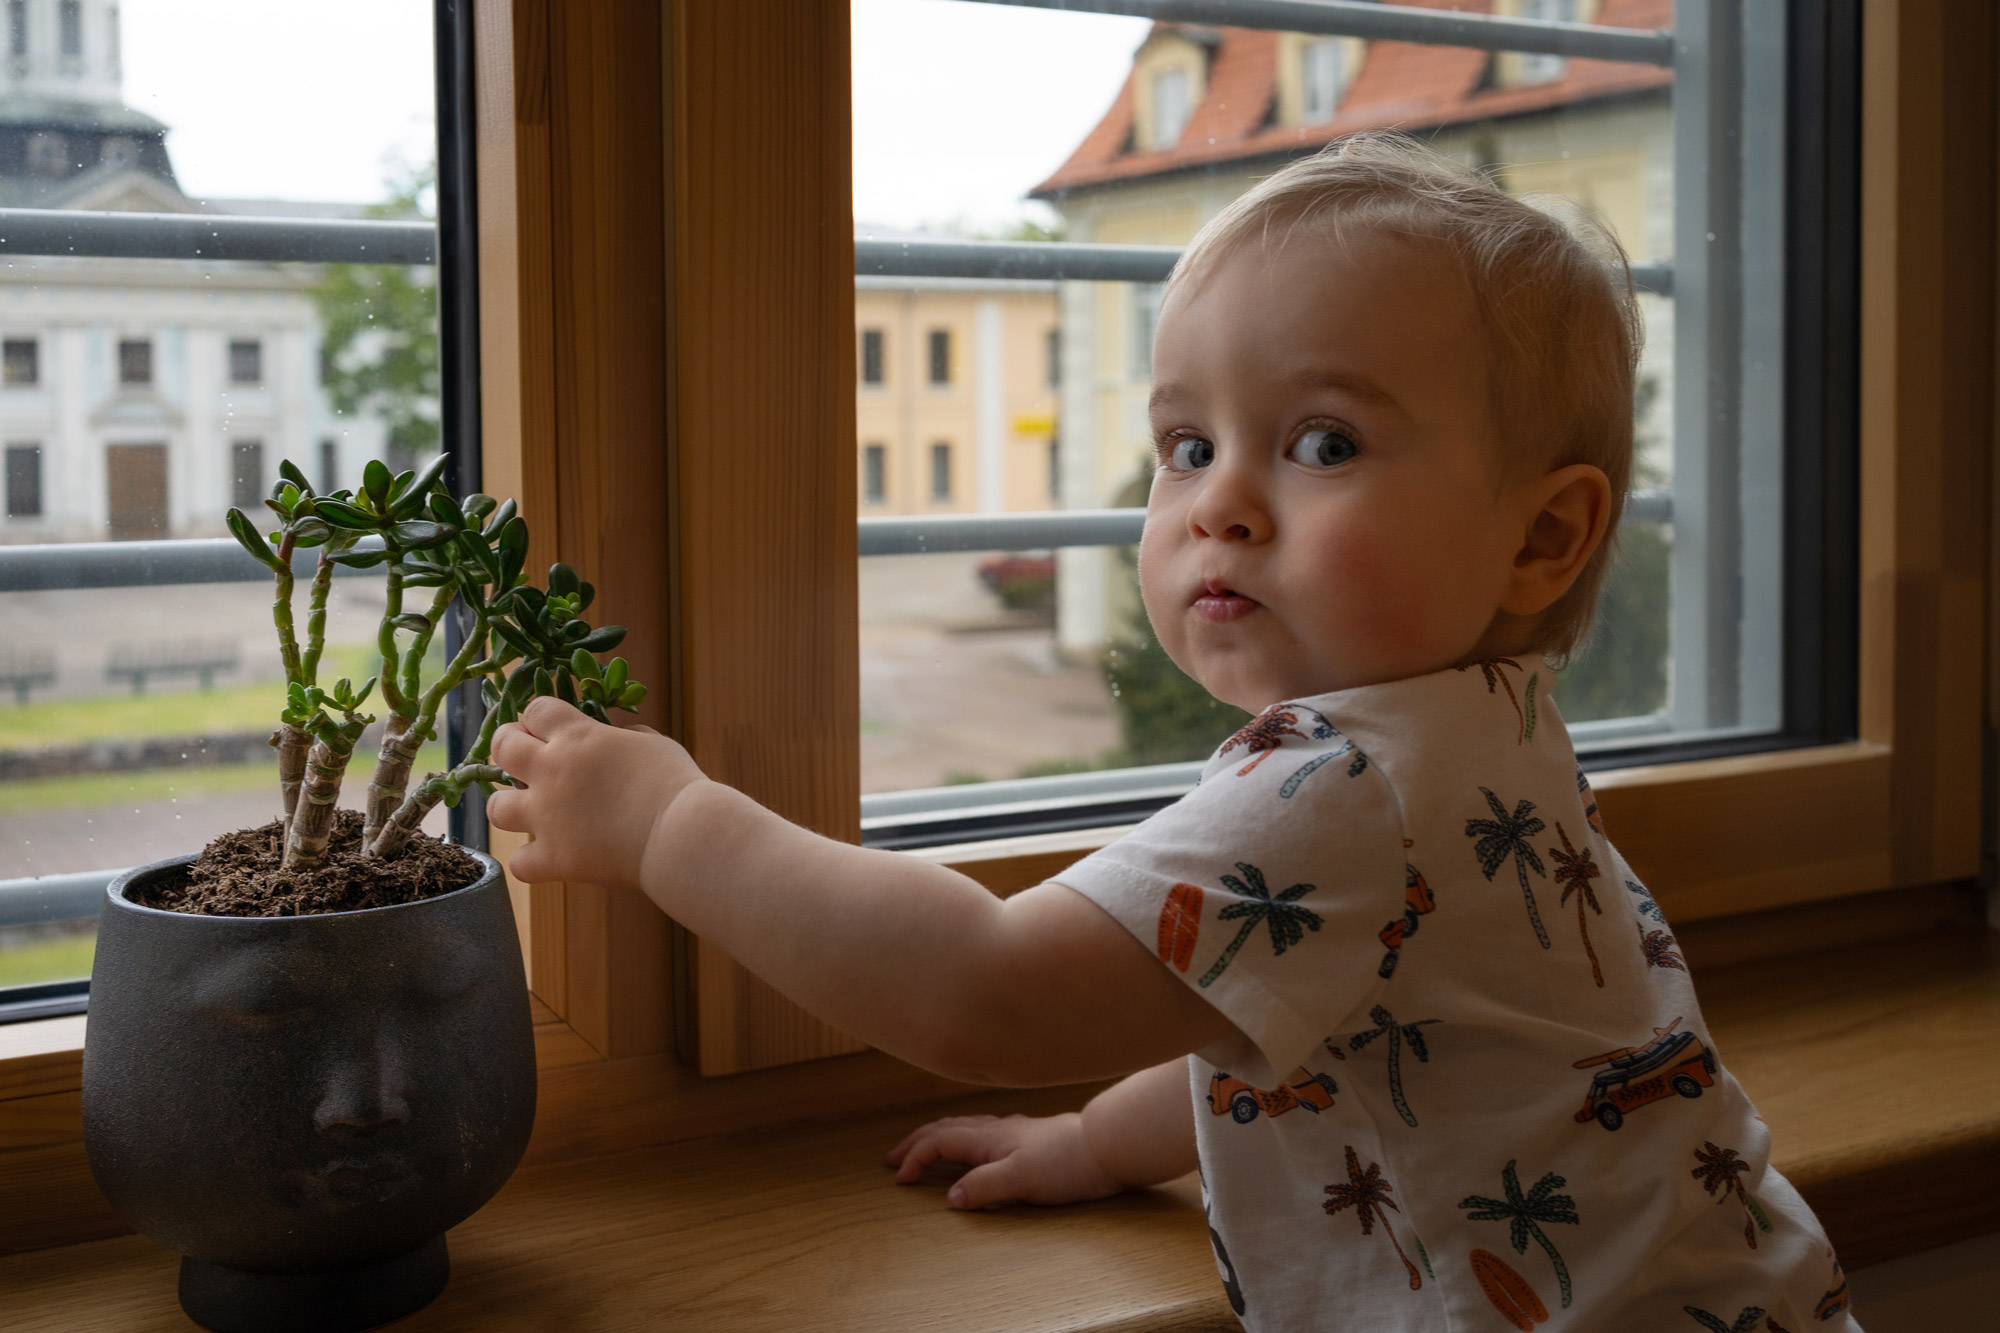
Position your subject about 3 to 6 feet away from the window. Too close and the light will be too harsh on one side. Too far and you lose that beautiful window light.
Think about your background too. A plain wall works great. A bookshelf can add interest without being distracting. Keep backgrounds simple so your kids remain the star of the photo.
Side Lighting happens when light comes from the side of your subject. This creates depth and dimension in your photos. One side of the face is lit while the other has gentle shadows. Position your child so the window is to their left or right. This technique works beautifully for both portraits and action shots. Learn more about this in this detailed guide to side lighting in photography.
Front Lighting means the window is behind you, shining directly on your subject. This creates even, soft light with minimal shadows. It’s the easiest type of light to work with and great for beginners.
Backlighting is when the window is behind your subject. This creates stunning, dreamy photos with a beautiful glow around your child. Just be careful not to let them become a dark silhouette.
Professional photographers use reflectors to bounce light back onto their subjects. You can do the same with items you already have:
Place your reflector opposite the window to fill in shadows. If light is coming from the left, put the reflector on the right side. This bounces light back onto the shadowy side of your child’s face.
Indoor photography requires different settings than outdoor shooting. The main challenge is less light, which means adjusting three things: aperture, shutter speed, and ISO.
Your Essential Indoor Settings:
For a deeper understanding of how these settings work together, check out this comparison of aperture priority vs shutter speed priority modes. And if you’re photographing children specifically, this guide on best camera settings for child photos breaks everything down.
Real homes have multiple light sources creating different colors of light. The easiest solution is to turn off all artificial lights and use only window light. This gives you consistent, natural-looking color.
If you must use artificial lights, try to match them. Use all warm-toned bulbs or all cool-toned bulbs. Better yet, invest in daylight-balanced bulbs that match window light color.
Doorways make excellent natural frames for your indoor family photos. Position your child in a doorway with good light. The door frame creates a border that draws attention to your subject.
Furniture can also add layers to your composition. Shoot through chair backs, over couches, or between table legs. These elements in the foreground create depth and make photos more interesting.
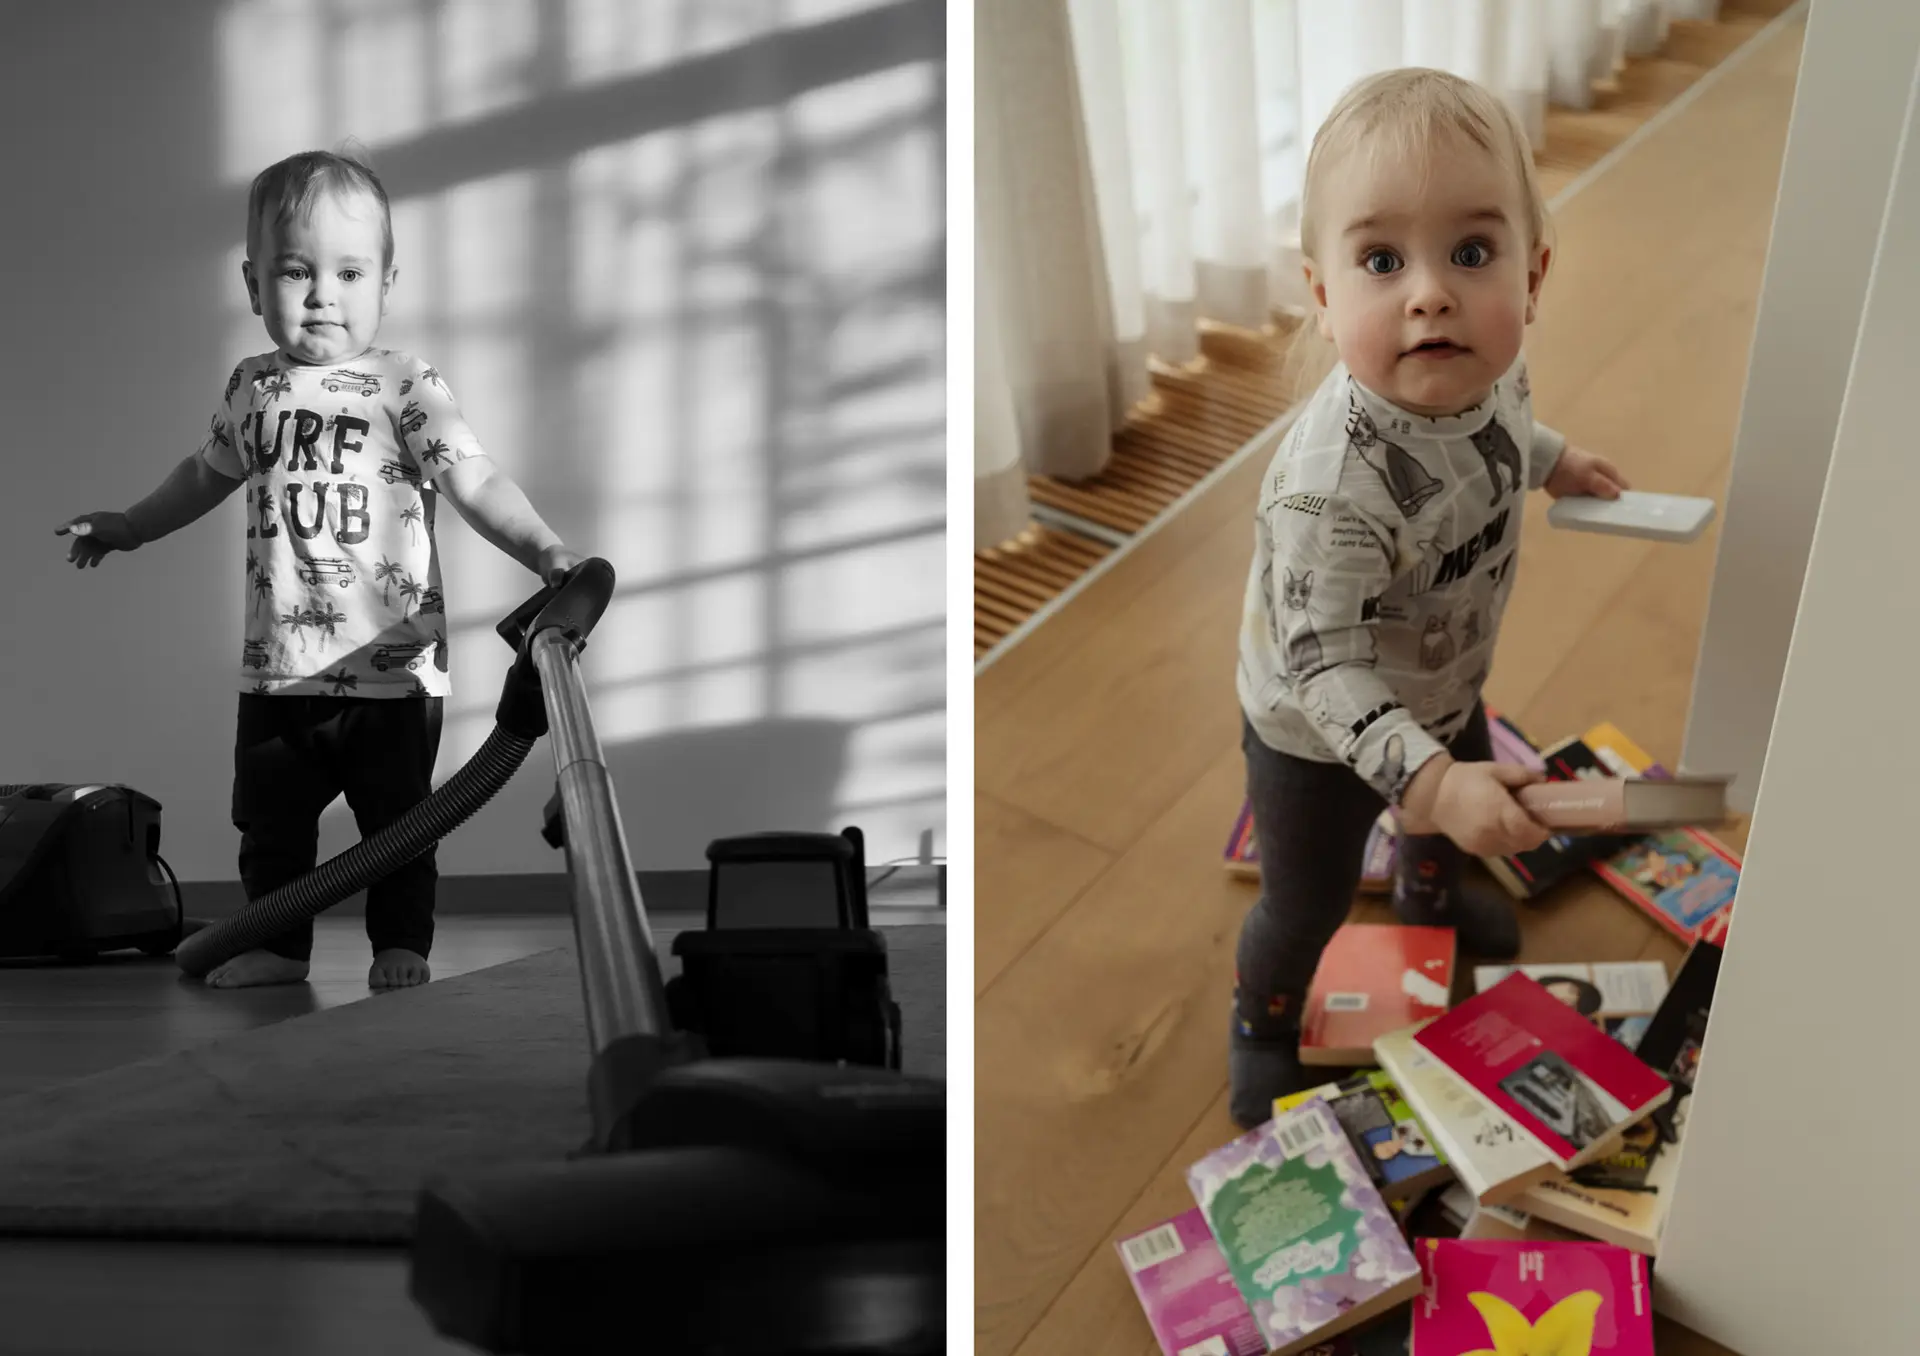
This photo shows how everyday furniture and play areas create interesting compositions:
The beauty of shooting at home is that kids are relaxed and acting naturally. Document what they’re actually doing – playing with toys, reading books, drawing, or being silly.
Keep your camera nearby and ready. Get down on their level. Shoot from their eye height rather than standing over them. Take lots of photos. You might shoot 50 to get 5 great ones, and that’s normal.
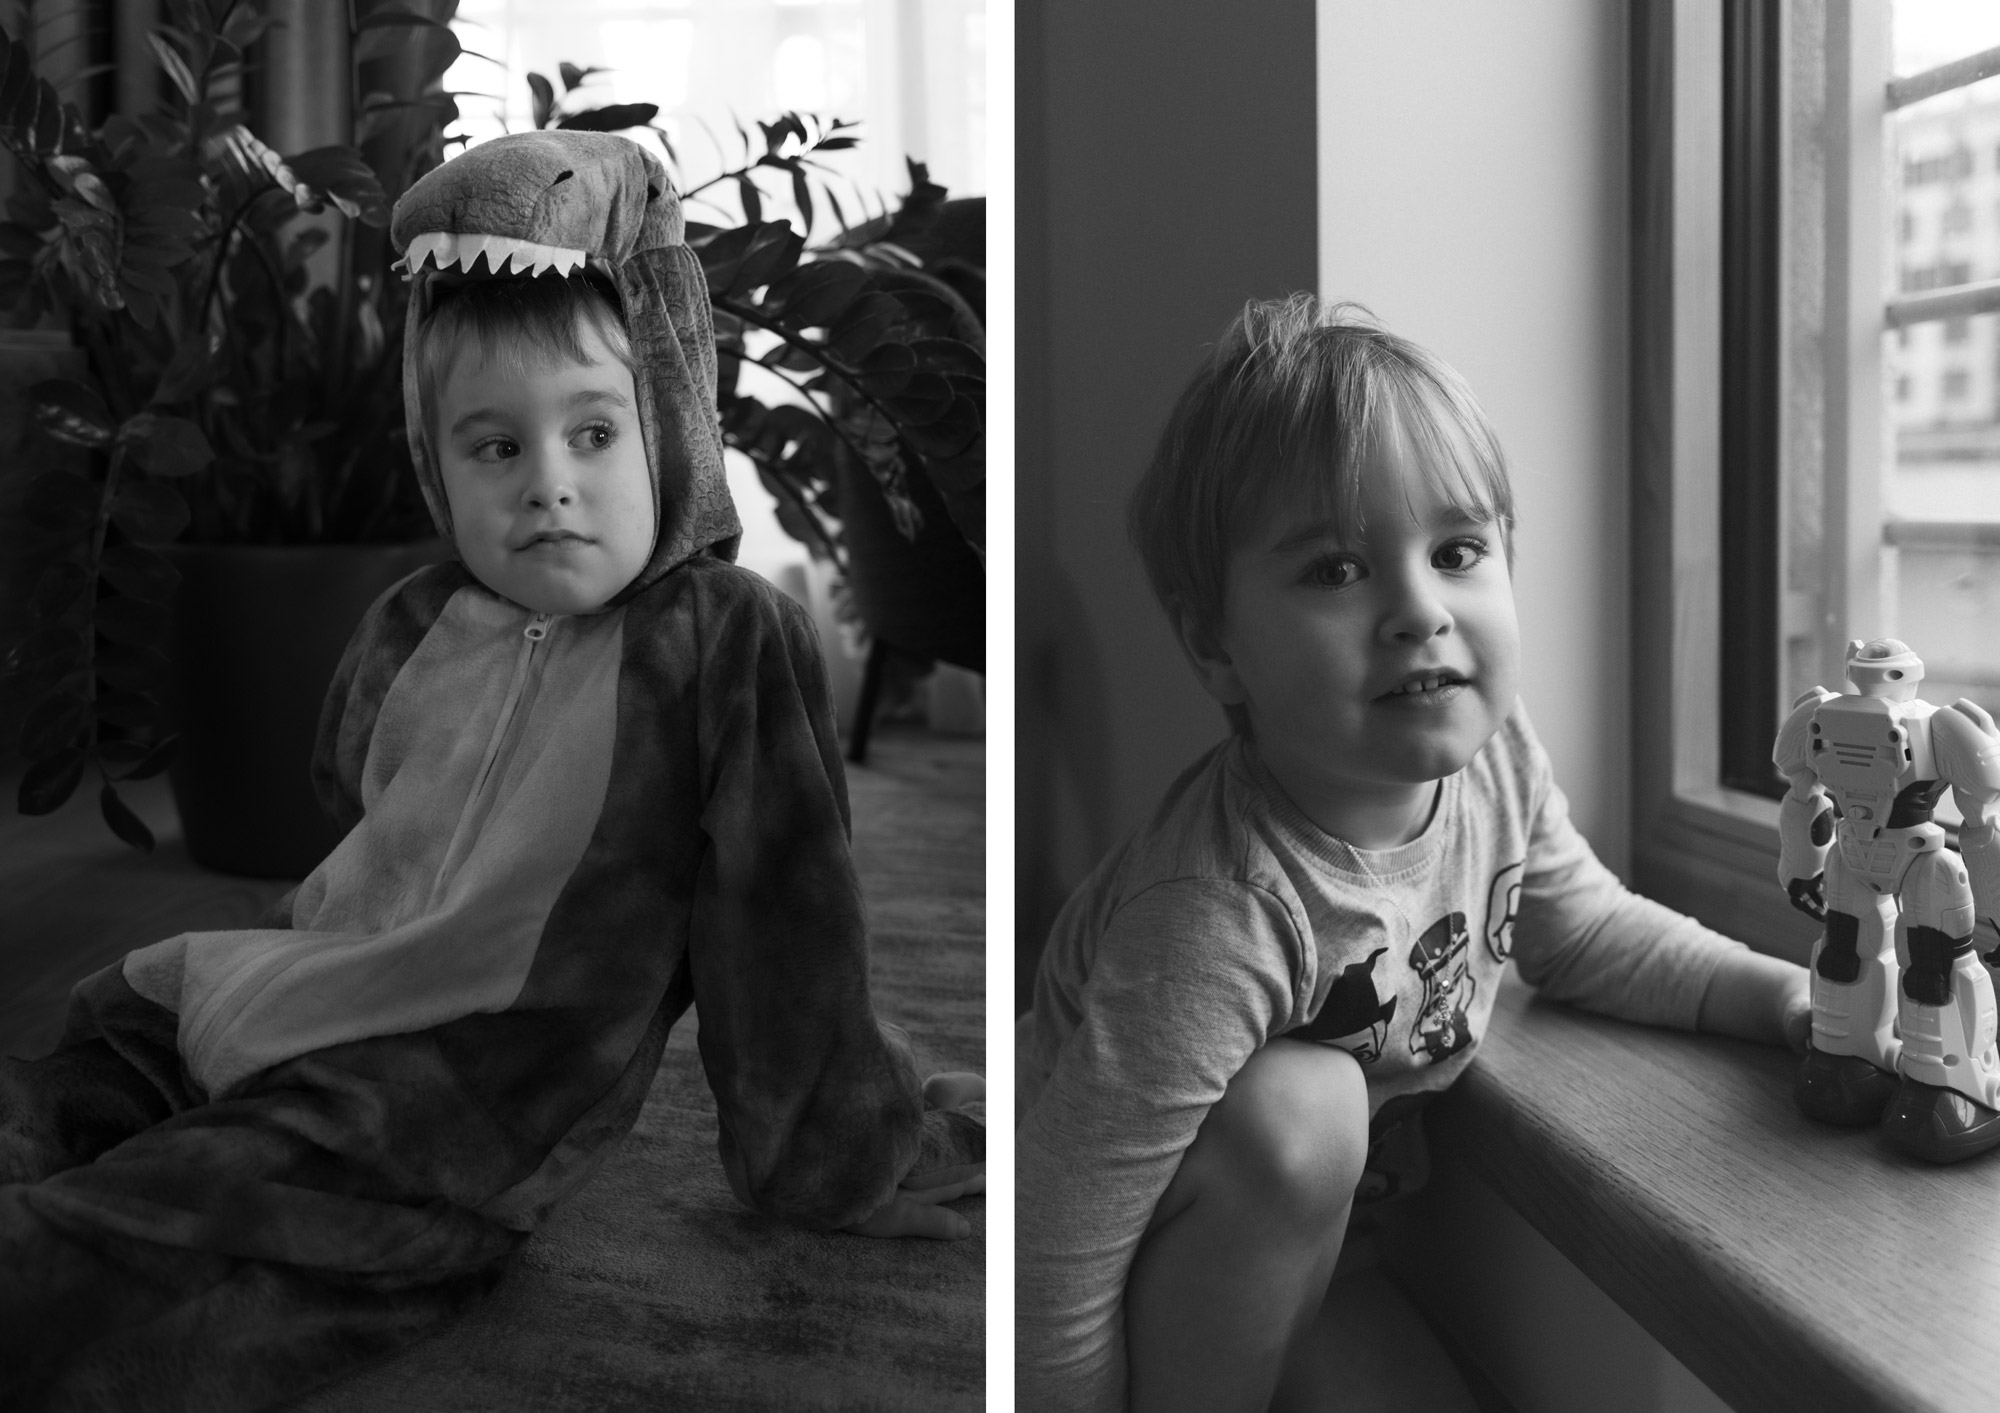
These images show the power of capturing natural, unposed moments:
Kids don’t sit still. But you can work with their energy instead of fighting it.
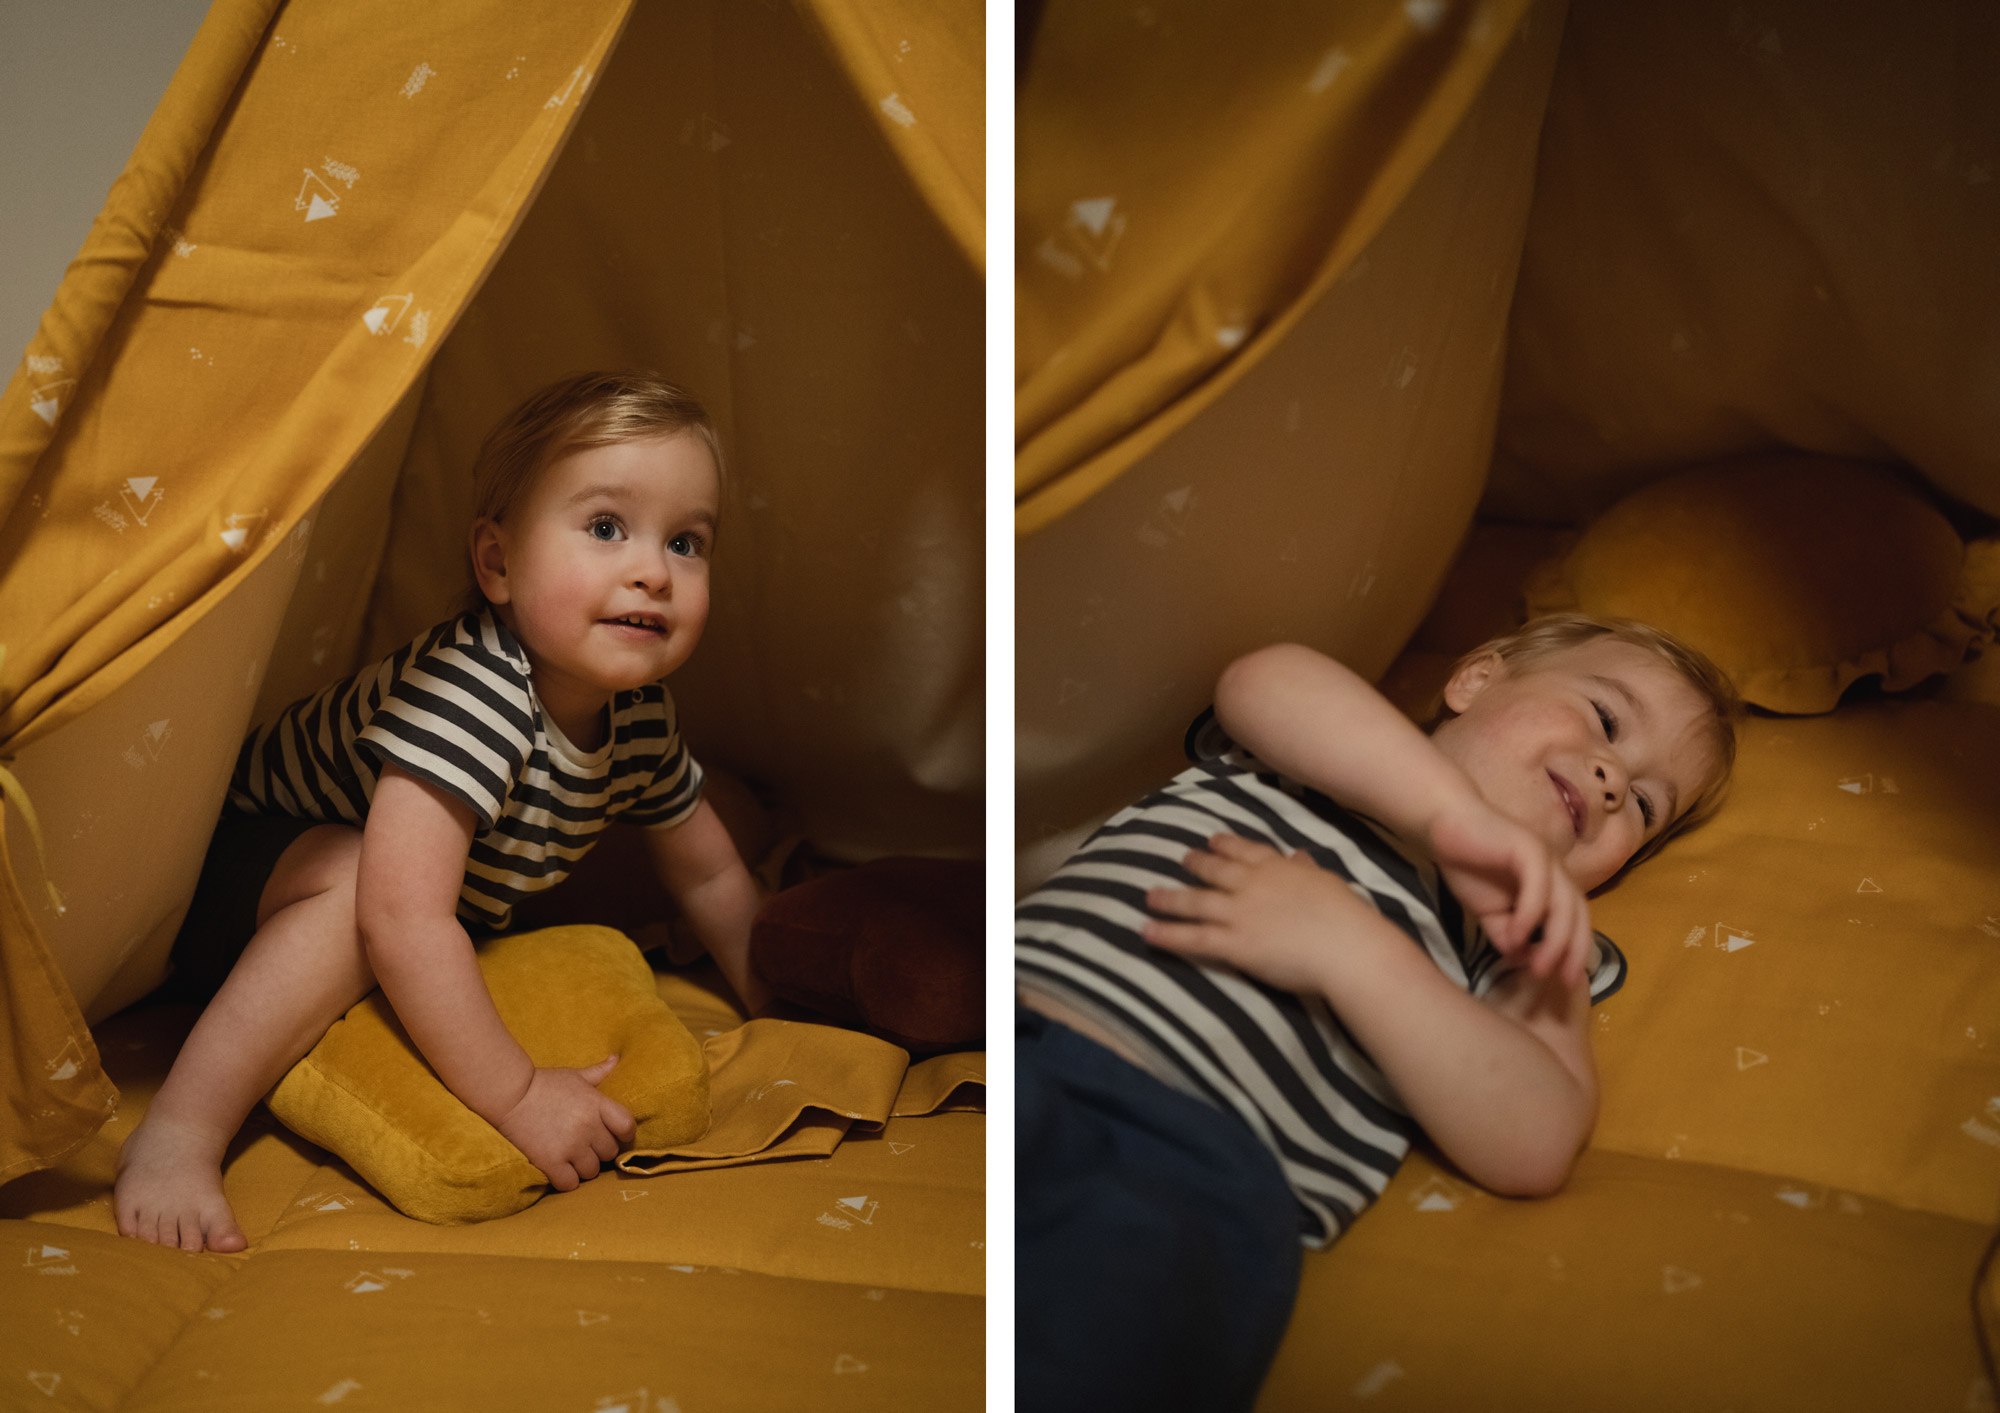
Give them something to do near your window light. Coloring, building blocks, or playing with favorite toys keeps them in one spot while giving you natural expressions.
Use continuous shooting mode (burst mode). Hold down the shutter button and your camera fires off several shots. One is bound to be sharp with a good expression.
Increase your shutter speed to freeze motion. For walking or playing, use at least 1/250th. For running or jumping, go to 1/500th or faster.
Even experienced photographers make these mistakes. Here’s how to fix them:
Start simple with just one window and one activity. Master that setup before trying to photograph kids running around the whole house.
Create a shot list of moments you want to capture: morning routines, play time, bath time, bedtime reading. Schedule regular photo sessions, even if just 10 minutes.
Most importantly, have fun. Your kids will sense if you’re stressed about getting the perfect shot. Relax, enjoy the moment, and let the photos happen naturally.
Learn how to make your family photos bright, natural, and frame-worthy, even if you’re brand new to Lightroom.
Natural light family photos at home are completely achievable without expensive equipment. Your windows provide beautiful light. Your everyday rooms become perfect backdrops. Your camera has the settings you need.
The secret is learning to see light, understanding basic camera settings, and practicing regularly. These indoor family photography tips work for any camera, any home, and any family.
Start today by identifying your best window light. Try one technique from this guide. You’ll probably surprise yourself with what you can create right at home.
For more comprehensive guidance on capturing your family’s story, check out this family photography guide that covers various aspects of family photography.
Your family’s everyday moments deserve to be documented beautifully. With these simple techniques for photography at home without flash, you can capture authentic, meaningful photos that your family will cherish forever.
| Cookie | Duration | Description |
|---|---|---|
| cookielawinfo-checkbox-analytics | 11 months | This cookie is set by GDPR Cookie Consent plugin. The cookie is used to store the user consent for the cookies in the category "Analytics". |
| cookielawinfo-checkbox-functional | 11 months | The cookie is set by GDPR cookie consent to record the user consent for the cookies in the category "Functional". |
| cookielawinfo-checkbox-necessary | 11 months | This cookie is set by GDPR Cookie Consent plugin. The cookies is used to store the user consent for the cookies in the category "Necessary". |
| cookielawinfo-checkbox-others | 11 months | This cookie is set by GDPR Cookie Consent plugin. The cookie is used to store the user consent for the cookies in the category "Other. |
| cookielawinfo-checkbox-performance | 11 months | This cookie is set by GDPR Cookie Consent plugin. The cookie is used to store the user consent for the cookies in the category "Performance". |
| viewed_cookie_policy | 11 months | The cookie is set by the GDPR Cookie Consent plugin and is used to store whether or not user has consented to the use of cookies. It does not store any personal data. |