

Nature, in all its unpredictable glory, often presents photographers with conditions that test their skills and equipment.
From the darkened skies heralding a storm to the bright glares of a sunny day, challenging weather can both hinder and elevate a photograph.
While it might be tempting to pack up and head indoors when the weather turns, those who brave the elements can end up with some of the most striking and unique images.
Photographing in Different Weather Conditions
Ok, you might be wondering how to capture these moments without compromising your equipment or the quality of your shots. Let’s delve into some essential tips for photographing in challenging weather conditions.
Overcast or Cloudy Day
There is no “best weather for photography,” but I sure love a photoshoot in cloudy weather. That’s because it can result in beautiful outdoor natural portrait shots. Having a cloudy weather photoshoot is like using a natural softbox.

Midday sun is notorious for its sharpness, creating exaggerated contrasts and casting unflattering shadows on a subject’s face. But under a cloudy canopy, this light is softened, giving a glow without the pronounced dark areas.
But for landscape photographers, an overcast sky is like a blank canvas. A gray sky might be devoid of character and the vibrant colors of a sunset or the dramatic gradient of a blue sky. But you can change that.
If photographing a serene lake surrounded by forests, a stormy sky can add a contrasting drama to the tranquility below. But, if the gray backdrop doesn’t serve your plot, you can always ‘zoom in’ on your stage, focusing on actors (like trees, animals, or buildings) and leaving it out.
Free Lightroom Course for Parents. Create Natural, Professional Family Photos
Learn how to make your family photos bright, natural, and frame-worthy, even if you’re brand new to Lightroom.
Rain

Preparation for Rain Photography
- Waterproof Protection: When there’s rain around, protect your gear. A waterproof camera bag can be the shield, while an umbrella or a protective cover will prevent droplets from blurring your masterpiece. Use lens hoods to prevent drops from settling on the lens.
- Camera Settings in Rain: The cloudy sky might require adjustments like a slower shutter speed or a wider aperture due to reduced sunlight.
- Rain transforms every location: wet streets reflect the ambient lights, adding a gleaming aspect to the environment. Dewdrops on grass and the shimmer on foliage can create a magical ambiance. Overcast skies from rain clouds help distribute light uniformly, coffee shops exude warmth and coziness, and building overhangs transform into sheltered places for your models to inhabit.
Rain can also encourage you to use props such as a colorful umbrella that can add a pop of color reminiscent of vintage movies.

Let the raindrops set the mood. And, if your subjects are willing, let them be drenched – a wet hair look or water droplets on the face can introduce raw emotion to the frame.
Examples:
- A misty countryside with water droplets on every leaf
- A city street that reflects neon lights
Sharpen Your Photography Skills in One Afternoon
Download my free guide with 10 expert techniques that took me years to master. You’ll discover the simple shifts that separate amateur shots from frame-worthy photos.
Join 300+ photographers already leveling up their skills
Hot Weather
Capturing photos in extreme weather is challenging, but when done right, it can result in the most fascinating photographs. However, bad weather photography requires you to be ready for it!

Preparations for photographing in scorching weather:
- Think of essentials like water, shade, and face powder to reduce unwanted shine.
- Equip yourself with diffusers and reflectors to masterfully manipulate the sunlight.
- Consult your camera manufacturer’s guidelines on heat and humidity before heading out.
- Hot climates can deplete batteries quickly. So, always pack spares.
- When shooting in sandy areas, avoid lens switches. If you must, ensure you’re in a protected, clean space. Protection against sand and sunlight is necessary.
- A camera bag with a rain cover can shield against both.
- For humid areas: silica gel packs can be handy in your camera bag to absorb moisture.
Always favor safety over aesthetics: While visuals are important, the comfort of everyone involved is paramount. Setting a temperature limit for shoots can be a lifesaver. While 90°F might feel breezy on a Puerto Rican beach due to the ocean winds, the same temperature in a concrete-laden city like Boston can be overwhelming.
Always remember to gauge the comfort level of those being photographed. If they’re uncomfortable, postpone the shooting.
Bright Light
In intense sunlight, your camera measures light either from the brilliantly illuminated background or the forefront subject.
This might lead to the subject appearing underexposed or the background becoming overexposed. A solution? Place your subject in a shaded spot that’s near the sunlit area and use a reflector to bounce sunlight back to them.

Bright sunlight can also cast harsh shadows on your subject. You can avoid this by filling the light with a flash, pointing it at the dark shadows, and shooting. You can also do this with a reflector.
Of course, you can always embrace the shadow and use it creatively.
Other things that can help you tackle bright light:
- Using a filter: In photography, filters are just like sunglasses. They can reduce glare, enhance colors, or even create dreamy effects. So if you shoot in daylight frequently, consider buying an ND filter that will reduce the amount of light passing through the lens.
- Defending Against Flares: Ever notice how a cap can shield your eyes from sunlight? A lens hood does the same for your camera, guarding against those annoying lens flares.
- Using Spot Metering: Spot metering lets you “spotlight” your subject, ensuring they are perfectly lit, even in challenging lighting.
- Creating Silhouettes: Instead of viewing bright sunlight as a challenge, use it creatively to capture silhouettes, creating dramatic, impactful images.

Examples:
- Cityscapes with Shadows: Picture a city street at noon. The buildings create long, dramatic shadows on the streets. This play of light and shadow can add depth and dimension to an otherwise bland scene.
- Sunlit Beach with Reflections: Think of a scenario where the sun’s rays hit the ocean, causing a shimmer. By exposing correctly, you can capture the glint on the water while still showing the detail in the sands below, creating a stunning contrast.
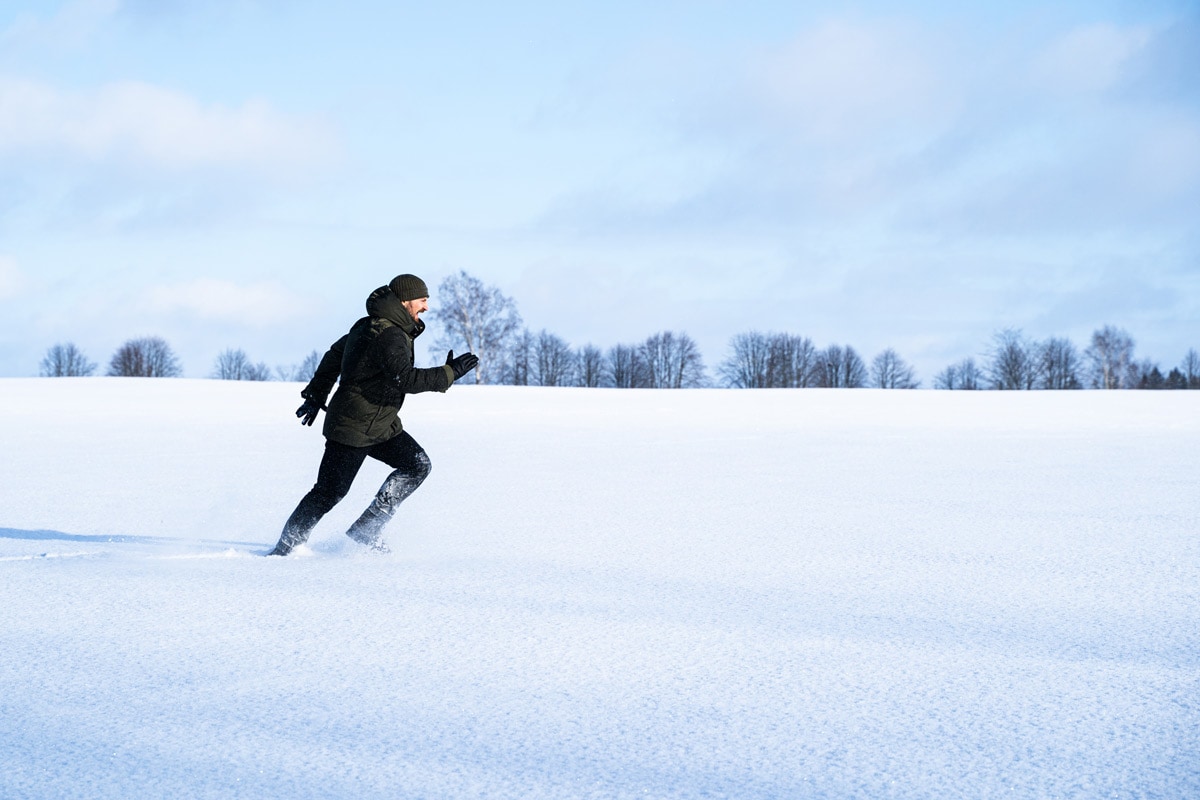
Snow
Cold weather photoshoot ideas like snow-clad landscapes or snowflakes in the air can look mesmerizing. The serene beauty and unique lighting conditions snow offers are unparalleled.
Photographing arctic wildlife, such as rare and captivating visuals of penguins or polar bears, often fetch a premium price in the photography market, making the journey worth the risk for some. As for the rest of us, there are other ways to get creative with snow.
Possible issues when shooting in snow:
- Like hot weather, extreme cold can wreak havoc on your gear; primarily because those snowflakes can quickly turn into water droplets. The easy solution is to use a waterproof camera bag.
- Cameras are designed to average out scenes to a neutral gray. Thus, they can misinterpret the brightness of the snow. As a result, the captured image will make the snow look dull, and the background will be plunged into shadows. Photographers can combat this by intentionally overexposing the shot, ensuring that snow retains its brilliance and that the rest of the scene is lit correctly.
- The automatic white balance can get skewed, sometimes casting a blue or gray hue over the entire image, so many photographers preemptively adjust the camera’s white balance settings to a mode tailored for snow conditions.
Fog and Mist
Embracing the ethereal allure of fog and mist can elevate your photographs to an entirely different realm. While they might obscure detail, fog, and mist often imbue a scene with a sense of mystery and moodiness that few other weather conditions can match.

Issues when shooting in the fog:
- Auto-focus can sometimes struggle in foggy conditions due to the lack of contrast. Switching to manual focus can help you get a sharper image. If your camera has focus peaking, this can be a valuable tool in such situations.
- Much like snow photography, fog, and mist can sometimes throw off a camera’s automatic white balance, often leading to cooler and bluish tones. While this can sometimes enhance the mood, if it’s not what you’re aiming for, manually adjusting the white balance or post-processing can correct this.
Tips and tricks:
- Shoot Early or Late: The best fog and mist typically occur in the early morning or late evening. Not only does this give you the best lighting conditions, but it also enhances the visual impact.
- Use Leading Lines: Fog can often flatten an image because of its diffusive nature. To counteract this and add dynamism, use leading lines. Features like roads, paths, rivers, and fences can act as visual guides, leading the viewer’s eye through the fog and adding depth to the scene.
- Silhouettes and Shadows: The dense nature of fog can help create stunning silhouettes. Position your subject between yourself and the light source for the best effect. Similarly, the filtered light through fog can cast soft shadows, adding layers to your composition.
Storm Chasing Photography
For some photographers, the lure of the ordinary isn’t enough. They’re drawn to the adrenaline-rushing spectacle of nature’s fury. Storm-chasing photography is about daring the elements and showcasing the true power of nature.

The magnificence of tornadoes and hurricanes, captured in full force, evokes emotions ranging from awe to fear. Such photographs are a stark reminder of nature’s might and humanity’s place within it.
While the payout for such photos can be huge, the risks involved are monumental, even becoming a danger to one’s life.
Weather-resistant gear and covers are vital in this case, but that just scratches the surface. Some audacious photographers take it a step further, placing cameras directly in a storm’s path – using remote controls from safer distances, specialized equipment like sturdy protective cases to shield the camera from debris, and tripods anchored firmly to the ground.
Pro Tips for Shooting in Bad Weather Conditions
- Snowflakes can confuse autofocus, so use manual focus or focus on a contrast-rich spot.
- Shoot during early mornings or late afternoons for softer light.
- Cloudy days can make colors pop, especially greens and blues.
- The texture of airborne sand or dust can add drama to a photo.
- Allow your gear to adjust to the humidity before shooting to avoid lens fogging.
- Always prioritize personal safety over a shot.
Different Weather Conditions and Camera Settings
Below are recommended settings for ISO, Shutter Speed and Aperture for different weather conditions:
Overcast or Cloudy Day
- ISO: Lower, between 100-400. Cloudy conditions offer soft light, but it can be dim. Depending on how dark the cloud cover is, adjust your ISO accordingly.
- Shutter Speed: If you’re photographing static subjects like landscapes, you can use slower speeds (like 1/60 sec), but for moving subjects, use faster ones (like 1/250 sec or faster).
- Aperture: Varied, according to the look you’re going for (bokeh or no bokeh)
Rainy Day
- ISO: Moderate to high, 400-800. Rain usually means darker skies.
- Shutter Speed: Faster to capture raindrops without blur, like 1/500 sec or faster. Lower, if it’s too dark.
- Aperture: Open wider to let in more light, f/2.8 to f/5.6.
Bright Sunlight
- ISO: Lowest, often 100 or 200.
- Shutter Speed: Faster, to prevent overexposure. 1/500 sec to 1/2000 sec.
- Aperture: Smaller (higher f-number) to reduce the amount of light entering, like f/8 to f/16. If you’re going for bokeh, you can go wider.
High Temperatures
- ISO: Moderate, around 100-400. High temperatures don’t directly affect ISO, but the brightness of the environment does.
- Shutter Speed: Adjust based on the subject. But remember, camera sensors can become more noisy with prolonged use in high heat.
- Aperture: Adjust based on the desired depth of field and lighting conditions.
Snow
- ISO: Low to moderate, 100-400. Snow reflects light, increasing brightness.
- Shutter Speed: Moderate to fast, depending on the scene. 1/250 sec to 1/1000 sec.
- Aperture: f/5.6 to f/11. Adjust based on the desired depth of field.
Note: Snow can cause your camera’s metering system to underexpose the scene, thinking it’s brighter than it is. Compensate by overexposing by +1 or +2 stops.
Fog and Mist
- ISO: Moderate to high, between 200-800. Depending on the thickness of the fog or mist, you might need to adjust your ISO to achieve the right exposure.
- Shutter Speed: For static scenes, you can use slower speeds like 1/60 sec. If there’s any movement within the fog, such as birds or people, you might need faster speeds, around 1/250 sec or faster.
- Aperture: For isolating subjects within the fog, use a wider aperture like f/2.8. If you want to capture the depth of the fog, use a narrower aperture around f/8 to f/11.
Storm Photography
- ISO: Depends on lightning frequency and ambient light. Can range from 100 to 1600.
- Shutter Speed: Long exposures if you’re trying to capture lightning, like 10-30 seconds. Use a tripod to keep the camera steady.
- Aperture: f/4 to f/11. Adjust based on the desired depth of field and available light.
How to Take Photos in Challenging Weather Conditions: Conclusion
While nature may occasionally test our patience and equipment, it also gives us scenes of unparalleled beauty. It’s essential to be prepared, understanding both the technical adjustments and the creative potential each weather type offers.
So, the next time nature acts up, don’t shy away. You have all the techniques now! And if you feel like you need more, visit our other resources here at OhMyCamera!